Showing posts with label Create a Critter 2. Show all posts

Monday, March 31, 2014

FCCB #204 - Sketch Challenge

 Happy Monday and welcome to another Monday challenge at FCCB!


Challenge #204 Sketch Challenge

This Weeks Sponsor
Stamp set of Winner's Choice

Create a project inspired by the sketch below:

For my project this week, I decided to make an Easter gift bag.


I started with a plain kraft gift bag and pattern papers from two Paper Studio stacks.  I found the cute image of the chick in the egg on Create a Critter 2.  The accessory on that page is the bunny ears, which I thought would be a cute touch to tie my egg paper to the hippity hop paper.


I added google eyes to the chick, some glitter to the egg, and did some faux stitching on the ears.  There you have it - a fun gift bag, ready for some Easter treats!

I hope this sketch inspires you to join in the fun over at FCCB!  Remember, to qualify for the prize be sure to use at least 1 Cricut cut on your project and if it's not obvious, let us know what cartridge you used.  Thanks for stopping by!

Recipe:
Solid cardstock from Recollections
Pattern papers from The Paper Studio
Chick from Create a Critter 2 cut at 3.75 inches
Google eyes
Glitter
White Sakura gel pen
Monday, February 3, 2014

FCCB 196 - Seeing Red

 Happy Monday!  It's time for another fun challenge over at FCCB!


Challenge #196 Seeing Red
Use red (pink or white)

This Weeks Sponsor
Jaded Blossom
 Winner will receive the Got Candy stamp set.

This challenge works perfectly with Valentine's Day coming up.  I decided to get started on my cards for the occasion and came up with this.


I found the cute owl on the Create a Critter 2 cartridge.  I popped him up on top of my embossed background.


I used a Jaded Blossom sentiment and finished my card off with some twine.

Thanks for stopping by to take a look at my creation!  I hope that you will all visit FCCB and join in this week's challenge!  To qualify for the prize, be sure to use at least 1 Cricut cut on your project and if it's not obvious, let us know what cartridge you used. 

Recipe:
Solid cardstock from Recollections
Pattern cardstock from My Mind's Eye Love Me pad
Owl from Create a Critter 2 cut at 3.5 inches
Heart Blocks Cuttlebug embossing folder
Sentiment from Jaded Blossom's Simple Sayings Valentine Edition
Twine

Friday, December 27, 2013

Christmas Tags

Happy Friday!  I'm enjoying a few days off work, spending some quality time with my sweetie.  But I'm also spending time "playing" and crafting!!

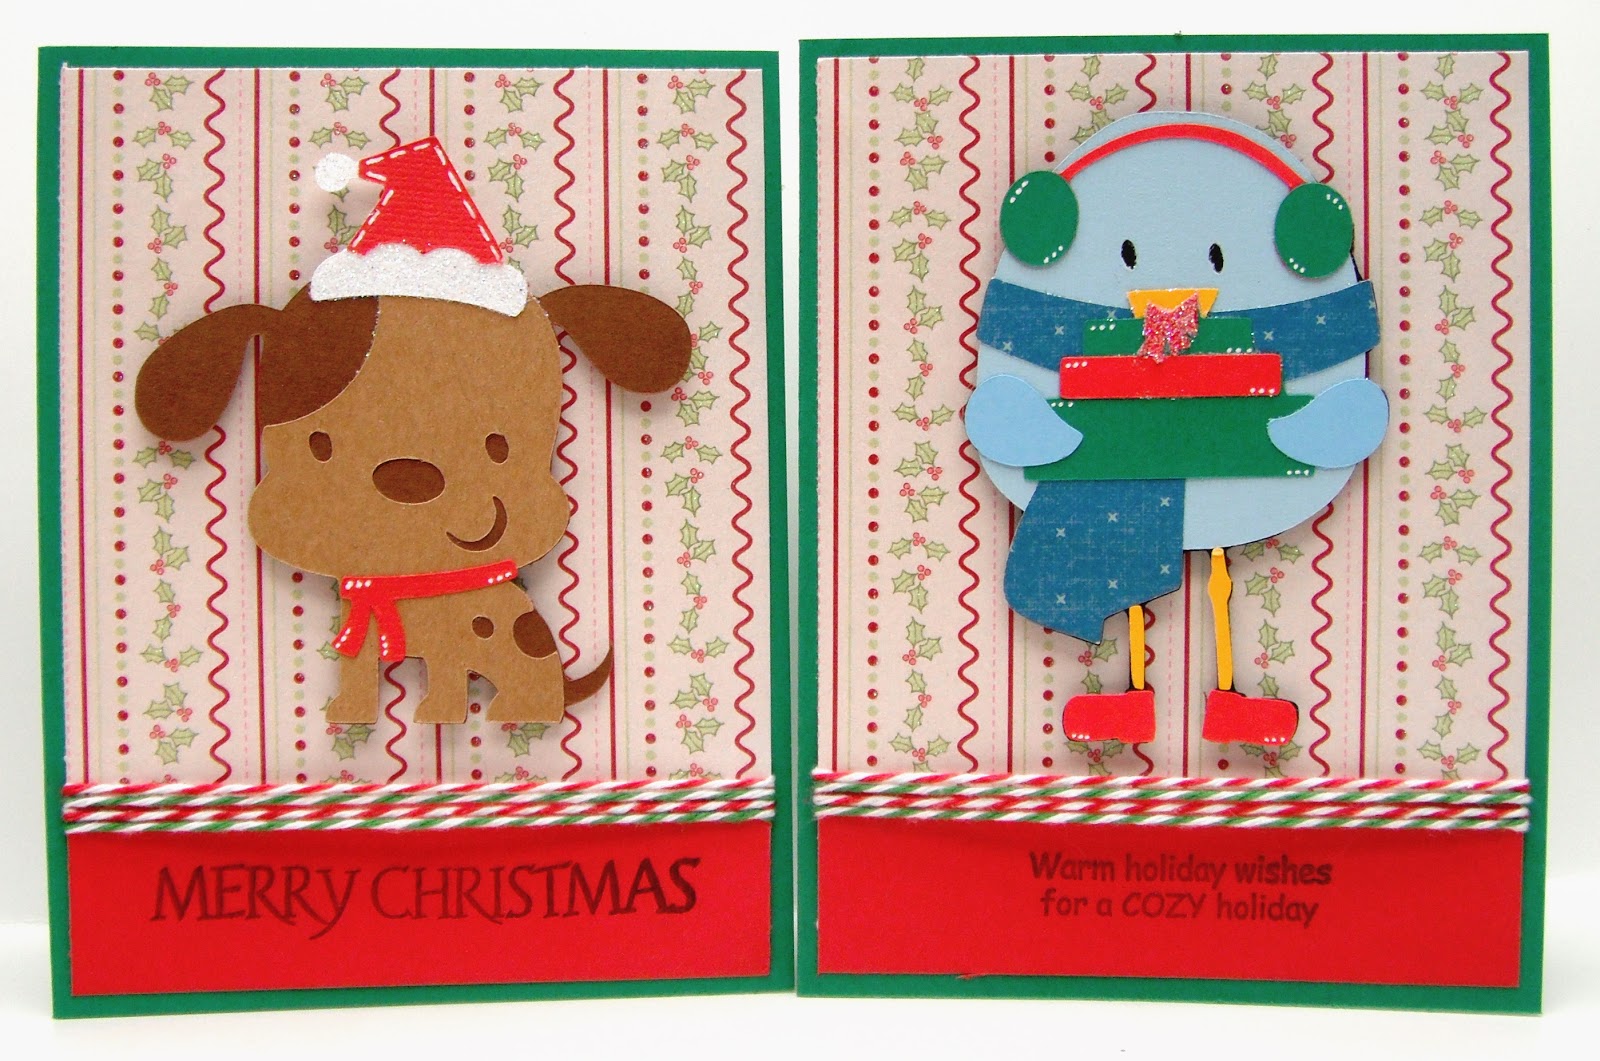
I thought I would share the Christmas tags I made.  These were pretty quick and easy to make, and the recipients of our Christmas gifts really seemed to like them.


The tags and their shadow images were cut from Plantin Schoolbook.


All of the images came from the Create a Critter 2 cartridge - there are so many adorable images on that cartridge!  I modified some of them in Cricut Craft Room, removing face cuts, for example, so I could use Peachy Keen stamps instead.


I added glitter and Stickles to most of the tags for a little bling.  Pretty simple, but a cute touch to Christmas gifts!

Thanks for coming by today!

Recipe:
Solid cardstock from Core'dinations
Pattern papers from The Paper Studio
Tags from Plantin Schoolbook cut at 3.5, 4 and 4.5 inches
Images from Create a Critter 2, all cut at 3 inches
Peachy Keen Stamps Winter Face Assortment

Monday, November 18, 2013

FCCB #187 - Animal Crackers

Happy Monday!  It's time for a new challenge over at Fantabulous Cricut!  This week we're looking for your projects that have an animal on it.

Challenge #187 Use an Animal
Create a project with an animal on it

~This Weeks Sponsor~

I decided to make a Thanksgiving card for this challenge.  I had a turkey image in mind when I sat down to make this card, but as I was flipping through the Create a Critter 2 booklet I saw this cute squirrel and I quickly changed my mind.


I added some faux stitching to my image, and finished off my card with a twine bow and button.


Thanks for stopping by to check out my creation!  Be sure to visit the FCCB blog and join in the challenge. You just need to use 1 Cricut cut to be eligible to win a prize from our sponsor!

Recipe:
Solid Cardstock from Recollections
Pattern paper from The Paper Studio
Squirrel from Create a Critter 2 cut at 3.5 inches
Fiskers Threading Water border punhc
Twine from The Twinery
Sentiment from My Pink Stamper's Happiest Moments set
White Sakura gel pen
Button from my stash

Monday, October 14, 2013

FCCB 182 - Black and Purple

Happy Monday!  It's time for another fun challenge over at Fantabulous Cricut!!  This week's challenge is a color challenge.  We want you to use Black and Purple as the main colors on your project.

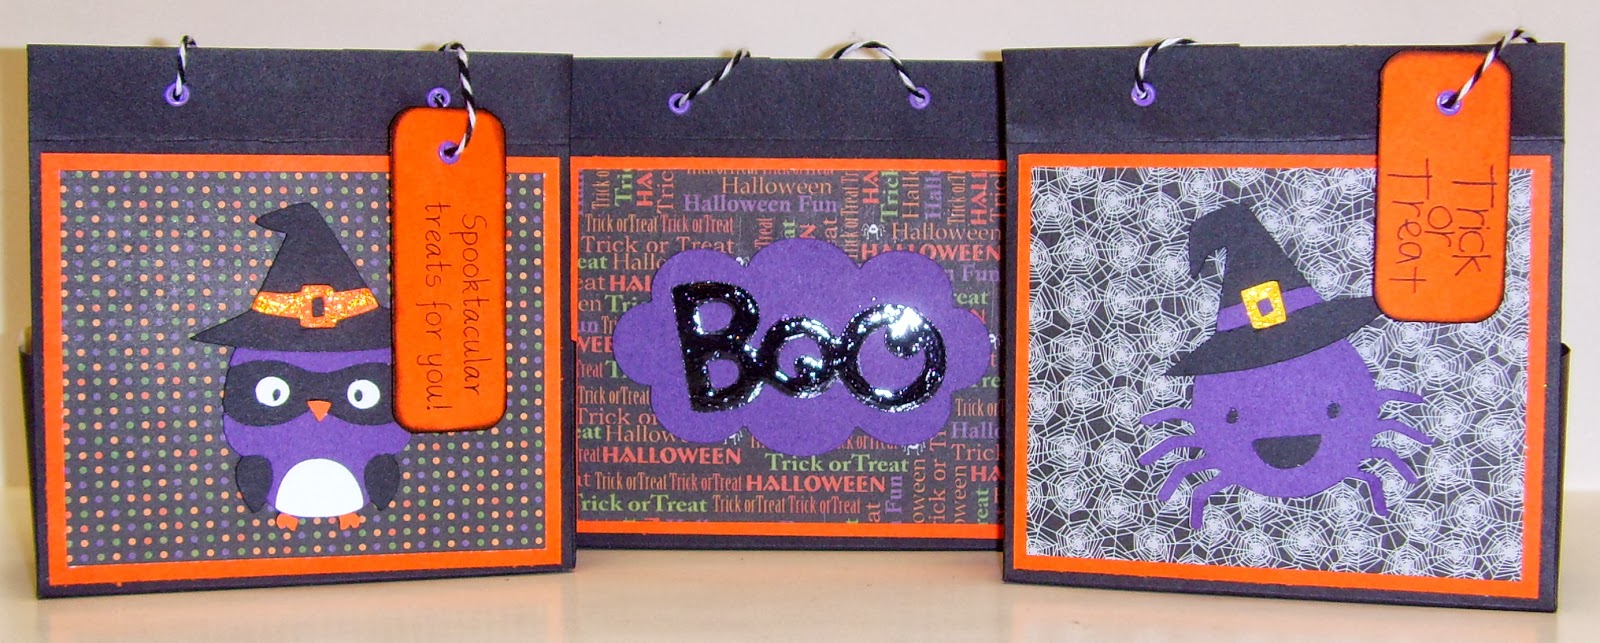
My first thought was Halloween - it is right around the corner after all!!  I decided to make some mini treat bags.


I saw a tutorial on Pinterest for making bags out of 8 1/2 x 11 paper with no cutting, only folding.  Check out the tutorial HERE and some great examples HERE.


I used Create a Critter 2 for all my cuts.  I started with this cute spider wearing a witch's hat.  I found this spider web paper in Paper Studio pad I have and thought it was the perfect background for this little guy.


I think the vampire bat is another cute Halloween image on the Create a Critter 2 cartridge.  And below is one of my favorites - the little owl wearing a witch's hat.


The tags were rectangles of cardstock that i used my corner chomper on to round the corners.  Then I punched a hole and put in a grommet using my Crop-A-Dile.  I used bakers twine for my handles, feeding it through the grommet on the tag when I attached them to the bags.


The back side of the bags are all the same.  I found this image on Create a Critter 2 as well.  I covered the letters in Glossy Accents so it would have a fun shine.

These were fun to make and I'm excited to hand out a few special Halloween treats in them!

Be sure to link up your black and purple creations at Fantabulous Cricut by Sunday evening!  I'm looking forward to seeing them!!

Recipe:
Solid cardstock from Recollections
Pattern paper from The Paper Studio
Spider from Create a Critter 2 cut at 2.5 inches
Vampire bat from Create a Critter 2 cut at 2 inches
Owl from Create a Critter 2 cut at 2.75 inches
Boo from Create a Critter 2 cut at 2 inches
Sentiments from My Pink Stamper's Spook-alicious set
Bakers Twine
Stickles
Glossy Accents

Monday, September 9, 2013

FCCB #177 Fall Vinyl Cricut Crawl

Welcome to Scrapping Runner Creations and the FCCB Vinyl Cricut Crawl - Fantabulous Cricut's version of a blog hop!!

This week we are challenging you to create a project using vinyl you have cut using your Cricut.  We have a fabulous sponsor, Cricket Vinyl Supplies.  If we get 100 participants in this challenge, Cricket Vinyl Supplies will give away a Cricut Expression package that includes a Cricut Expression machine, deep cut blade, Jasmine Cricut cartridge, ten 12 x 12 assorted sheets of matte vinyl and one 12 x 12 gridded transer tape.  How exciting is that??

If you've come from Jilliene at Jilliene Designing you're in the right place!  If you've just happened across my blog and would like to see all the fabulous Design Team creations, head on over to Fantabulous Cricut HERE to start at the beginning.

Make sure to check out each DT member's blog!  There will be blog candy along the way at ALL our DT members' blogs and there will be a Grand Prize up for grabs at FCCB for one participant who submits a project using vinyl at FCCB!

For my project I created this fun fall lantern.  I decorated the lantern with images of leaves and trees using great vinyl in fall colors from Cricket Vinyl Supplies.  The vinyl cut perfectly and I didn't have any issues getting it to the transfer tape and then onto the lantern.


I found the lantern on sale at the local Target store.  The cute fall-themed images are from Create a Critter 2 and Stretch Your Imagination.  Here are some close-ups.


And here's a picture of what the lantern looks like lit up.  I used a battery operated, flameless candle so I don't have to worry about the metal parts of the lantern getting hot or soot from the candle getting the glass dirty.


Blog Candy!!  I'm giving away two fun stamp sets to one lucky winner!  The Scrapbooking Queen's Royal Saying Too and The Queen Bee sets.  All you have to do to win is leave a comment on this post.  I will announce the winner next Monday!!


Your next stop is Joneita at Create with Joneita.  Make sure to visit all the stops along the way and when you get done, make sure you link up your project to FCCB's Fantabulous Cricut Crawl post!!

Happy Crawling!!

Here is the lineup in case you get lost:

Robin  http://robinscreativecottage.blogspot.com
Jilliene  http://jillienedesigns.blogspot.com
Heather  http://scrappingrunnercreations.blogspot.com
JoNeita  http://createwithjoneita.weebly.com
Jackie  http://luv2scrappp.blogspot.com
LB  http://www.coolbeansbylb.blogspot.com
Connie  http://www.conniecancrop.blogspot.com
Amy T www.craftingwithamy.com
Missy  http://www.quickchickdesigns.blogspot.com
Cindy  http://www.cindyvernon.blogspot.com
Rebecca  craftingmisfit.blogspot.com
Catarina  http://blog.docerelashop.com
Kim  ogdendoll.blogspot.com
Emily  molliemugsblog.blogspot.com
Amy HS  http://thestampingtree.blogspot.com
Ro  http://rodonner.blogspot.com
Lynn  http://mycardsnstuff.blogspot.com
Michelle  http://justanutterpapercrafter.blogspot.com

Recipe:
Lantern from Target
Vinyl from Cricket Vinyl Supplies
Tree from Create a Critter 2 cut at 4.5 inches
Leaves from Stretch Your Imagination cut at 2.5 inches
Raffia
Flameless candle

Sunday, March 31, 2013

Happy Easter!

Happy Easter everyone!!  It's a beautiful Spring day here and we plan to make the most of it.  My sweetie and I are hoping to get out and play some golf later this afternoon - my first time getting out on the golf course in 2013!

I wanted to share one more Easter card that I made this year.  I wanted to use another of the cute images from Create a Critter 2.  I also wanted to make something a little different than the standard A2 card.

I simply cut the front side of the card in half and attached the scalloped circle from Elegant Edges.
On the inside I put another scalloped circle, directly under the one on the front flap, to make a spot to write my message.  Pretty simple, but a little different, which is what I was after!

I hope you all have a fabulous holiday today!!

Recipe:
Solid cardstock from Recollections and The Paper Studio
Pattern paper from The Paper Studio
Scallop circle from Elegant Edges cut at 3 inches
Chick and bunny ears from Create a Critter 2 cut at 2.5 inches
Sentiment from My Pink Stamper's Happiest Moments set
i-rock gems

Monday, March 25, 2013

FCCB 154 - Easter

Happy Monday!!  Did you all have a good weekend?  We got more snow this weekend - nearly a foot!  I can't believe Spring is officially here when we have snow on the ground!

Monday means another fun challenge over at Fantabulous Cricut!!  This week's challenge is "Easter" - show us all your fabulous Easter creations!

I made a fun little card using Create a Critter 2.  I love all the fun images on that cartridge - all of the seasons and holidays are covered it seems!


I popped my bunny up on pop dots and added glitter to his ears, nose, cheeks and tummy.  I finished the card off with some twine and a button.


Be sure to check out all the other design team members' Easter projects and join in the fun with us this week!!  Thanks for stopping by and have a great week!

Recipe:
Solid cardstock from Recollections
Pattern papers from The Paper Studio
Bunny from Create a Critter 2 cut at 3 inches
Twine from My Craft Spot
Button from my stash
Glitter

Thursday, February 14, 2013

Happy Valentine's Day!

Happy Valentine's Day everyone!  Do you have any special plans for today??  My sweetie and I are going out to dinner tonight, but that's about all for me.  We're keeping it pretty quiet this Valentine's Day.  :-)

I decided to break out my Sweet Tooth Boxes cartridge and make a Valentine treat for my niece.  This was my first time using this cartridge and I must say I was a bit intimidated by the pictures in the handbook.  I tried to pick a container that didn't look too difficult to assemble in hopes I wouldn't overwhelm myself when it came time to try to put the thing together.  So I picked the box with the flip lid.  One of the lids already had a heart cut out of it, which is perfect for Valentine's Day!


 The box turned out to be really easy to put together.  I just may have to try more of these containers!  I cut a scrap piece of plastic film and attached it to the inside of the lid so there would be a clear window into the box and so the candy wouldn't fall out.


As you can probably tell from recent posts, I LOVE the images from the Create a Critter 2 cartridge.  I decided to pick some of those sweet images to decorate the box.


I filled the box with heart shaped Reese's and Dove candies.  I cut 1 inch circles in red and pink and stamped small sentiments on them which I attached to the bottoms of the candies with a glue dot.


I'm going to link this up to the "Be My Valentine" challenge over at Fantabulous Cricut.  Thanks for coming by to take a look and I hope you all have a lovely Valentine's Day!!

Recipe:
Solid cardstock from Bazzill and Recollections
Pattern cardstock from We R Memory Keepers
Box from Sweet Tooth Boxes cut at 11.25 inches
Koala, frog, owl and monkey from Create a Critter 2 all cut at 2.5 inches
Circles from Plantin Schoolbook cut at 1 inch
Sentiments from My Craft Spot's Always & Forever set
Swiss dots embossing folder
Stickles
Crinkle ribbon, twine and button from my stash


Friday, January 25, 2013

2 More IFTL Cards

Hello and Happy Friday!

I was really inspired by Madison's I feel the Love project this month and have two more cards to share with you today.  Madison is collecting Valentines for some of the students who survived the tragedy at Sandy Hook in December as well as cards for Ms. Victoria Soto, one of the teachers who was lost that day.  Stop by Madison's blog HERE for more information.


I just love all the images on the Create a Critter 2 cartridge and couldn't resist using nearly all of the Valentine-themed images for these cards.  They're just too adorable!

If you have a bit of time this weekend, be sure to check out Madison's blog and maybe even send a card her way!

Thanks for visiting!!

Recipe:
Solid cardstock from Bazzill and Recollections
Pattern cardstock from We R Memory Keepers
Bear and koala from Create a Critter 2 cut at 3.5 inches
Swiss dots embossing folder
Sentiment from My Pink Stamper's Happiest Moments set
Twine from My Craft Spot
Crinkle ribbon
Button from my stash

Friday, January 18, 2013

Another Valentine

Good afternoon and happy Friday!!  I hope you have all had a fabulous week!  Do you have anything fun planned for the holiday weekend?  I'm looking forward to having Monday off - I'm hoping to spend a bit of it crafting!  :-)

I wanted to share another Valentine I made that I'll be sending to Madison's I Feel the Love Project.  This month, Madison is collecting cards for the family of Ms. Victoria Soto, one of the teacher who lost her life in the tragedy at Sandy Hook Elementary school last month, as well as Valentine cards for Ms. Soto's students who survived.  Please visit Madison's blog HERE for more information.


I'm hoping to have a few more Valentines to share with you soon, as well as a card for Ms. Soto's family.

Enjoy the holiday weekend!!

Recipe:
Solid cardstock from Recollections
Pattern paper from The Paper Studio
Bee from Create a Critter 2 cut at 2.5 inches
Bee mine from Create a Critter 2 cut at 2 inches
White Sakura gel pen
Stickles

Tuesday, January 15, 2013

Valentine

Good morning!

I was able to spend a bit of time crafting this past weekend - always a good thing!  One of the things on my to-do list was to create some Valentines for this month's I Feel the Love Project.  Madison is currently collecting Valentines for some of the students that survived the tragedy at Sandy Hook Elementary School.  Madison is also collecting cards for the family of Victoria Soto, one of the teachers who lost her life.  Please visit Madison's blog HERE for more information.


This is the first card I made for Madison's project this month.  I hope to get a few more Valentines made as well as a card for Ms. Soto's family.  If you have some time send a card to Madison as well!!

Recipe:
Solid cardstock from Recollections
Pattern paper from The Paper Studio
Owl from Create a Critter 2 cut at 3.5 inches
OWL be yours from Create a Critter 2 cut at 3 inches
Martha Stewart Ribbon Loop punch
Swiss dots embossing folder
White Sakura gel pen

Tuesday, December 4, 2012

IFTL Christmas Cards

Good evening!!  Have you all been busy preparing for the holidays??  I love this time of year!  It's a little hard getting in to the spirit though because where I live we're experiencing unseasonably warm weather.  I'm not used to 60+ degree temps in December!  I definitely want at least some snow this year (perhaps a white Christmas?!?), and I would also like some colder weather so that I can get some use out of the scarves and hats I've crocheted this fall!

My weekend turned out to be a bit busier than I'd expected so I didn't get to spend much time crafting.  I did get some time last night though and I created a couple of Christmas cards to send to Madison's I Feel the Love project.  If you aren't familiar with her project, please visit her blog HERE.  She is collecting Christmas cards that will be taken to Children's Hospital Central California and delivered to children who will be spending the holidays there.


I think Madison has such a wonderful heart and collects cards for wonderful causes.  Thank you Madison!!  You still have time to send some cards Madison's way!!

Recipe:
Solid cardstock from Bazzill and Recollections
Pattern paper from Heidi Grace Designs
Santa puppy from Create a Critter 2 cut at 3.5 inches
Bird with presents from 3 Birds on Parade cut at 3.5 inches
Twine from My Craft Spot
Sentiments from Pink by Design's Christmas Wishes and Hero Arts Holiday Sayings sets
White Sakura gel pen
Glitter

Thursday, November 22, 2012

Happy Thanksgiving!

Happy Thanksgiving!  In my mind, the holiday season officially begins today.  This also means that I get to pull all my Christmas decorations out and start decorating the house.  As my sweetie so lovingly says, "It looks like Santa threw up in here."  I take that as a compliment and think that he's really trying to tell me how festive the house looks.  LOL!!  I love Christmas and all the decorations that go along with the holiday.  I have a few new creations in mind that I hope to be sharing with you soon!

But first, I have one more Thanksgiving card to share.  I'm going to submit this in the challenge over at Die Cuttin Divas, where the challenge is Thanksgiving!


I hope you were able to spend the holiday with friends or family, and that we are all reminded of the blessings surrounding us and all that we have to be thankful for.  Have a wonderful Thanksgiving!!

Recipe:
Solid cardstock from Bazzill and Recollections
Pattern paper from The Paper Studio
Pilgrim Squirrel from Create a Critter 2 cut at 3.5 inches
Sentiment from My Pink Stamper's Happiest Moments set
Ribbon from The Paper Studio
i-rock gems
White Sakura gel pen
Stickles
Google eyes

Saturday, November 10, 2012

Thanksgiving Wreath

Happy Saturday!  Are you all enjoying the weekend so far??  We are having wonderful weather here, though it is a bit windy!  I had a nice run this morning with one of my good friends and then my sweetie and I played in a golf tournament with another good friend of ours.  Got a few chores done and then I got to finish the project I'm sharing with you today.  So far my weekend is going great!  :-)

I saw a terrific Halloween wreath on Pinterest a while back and decided to make a Thanksgiving version to hang on our front door.  Check out the Halloween wreath I found HERE - very neat!

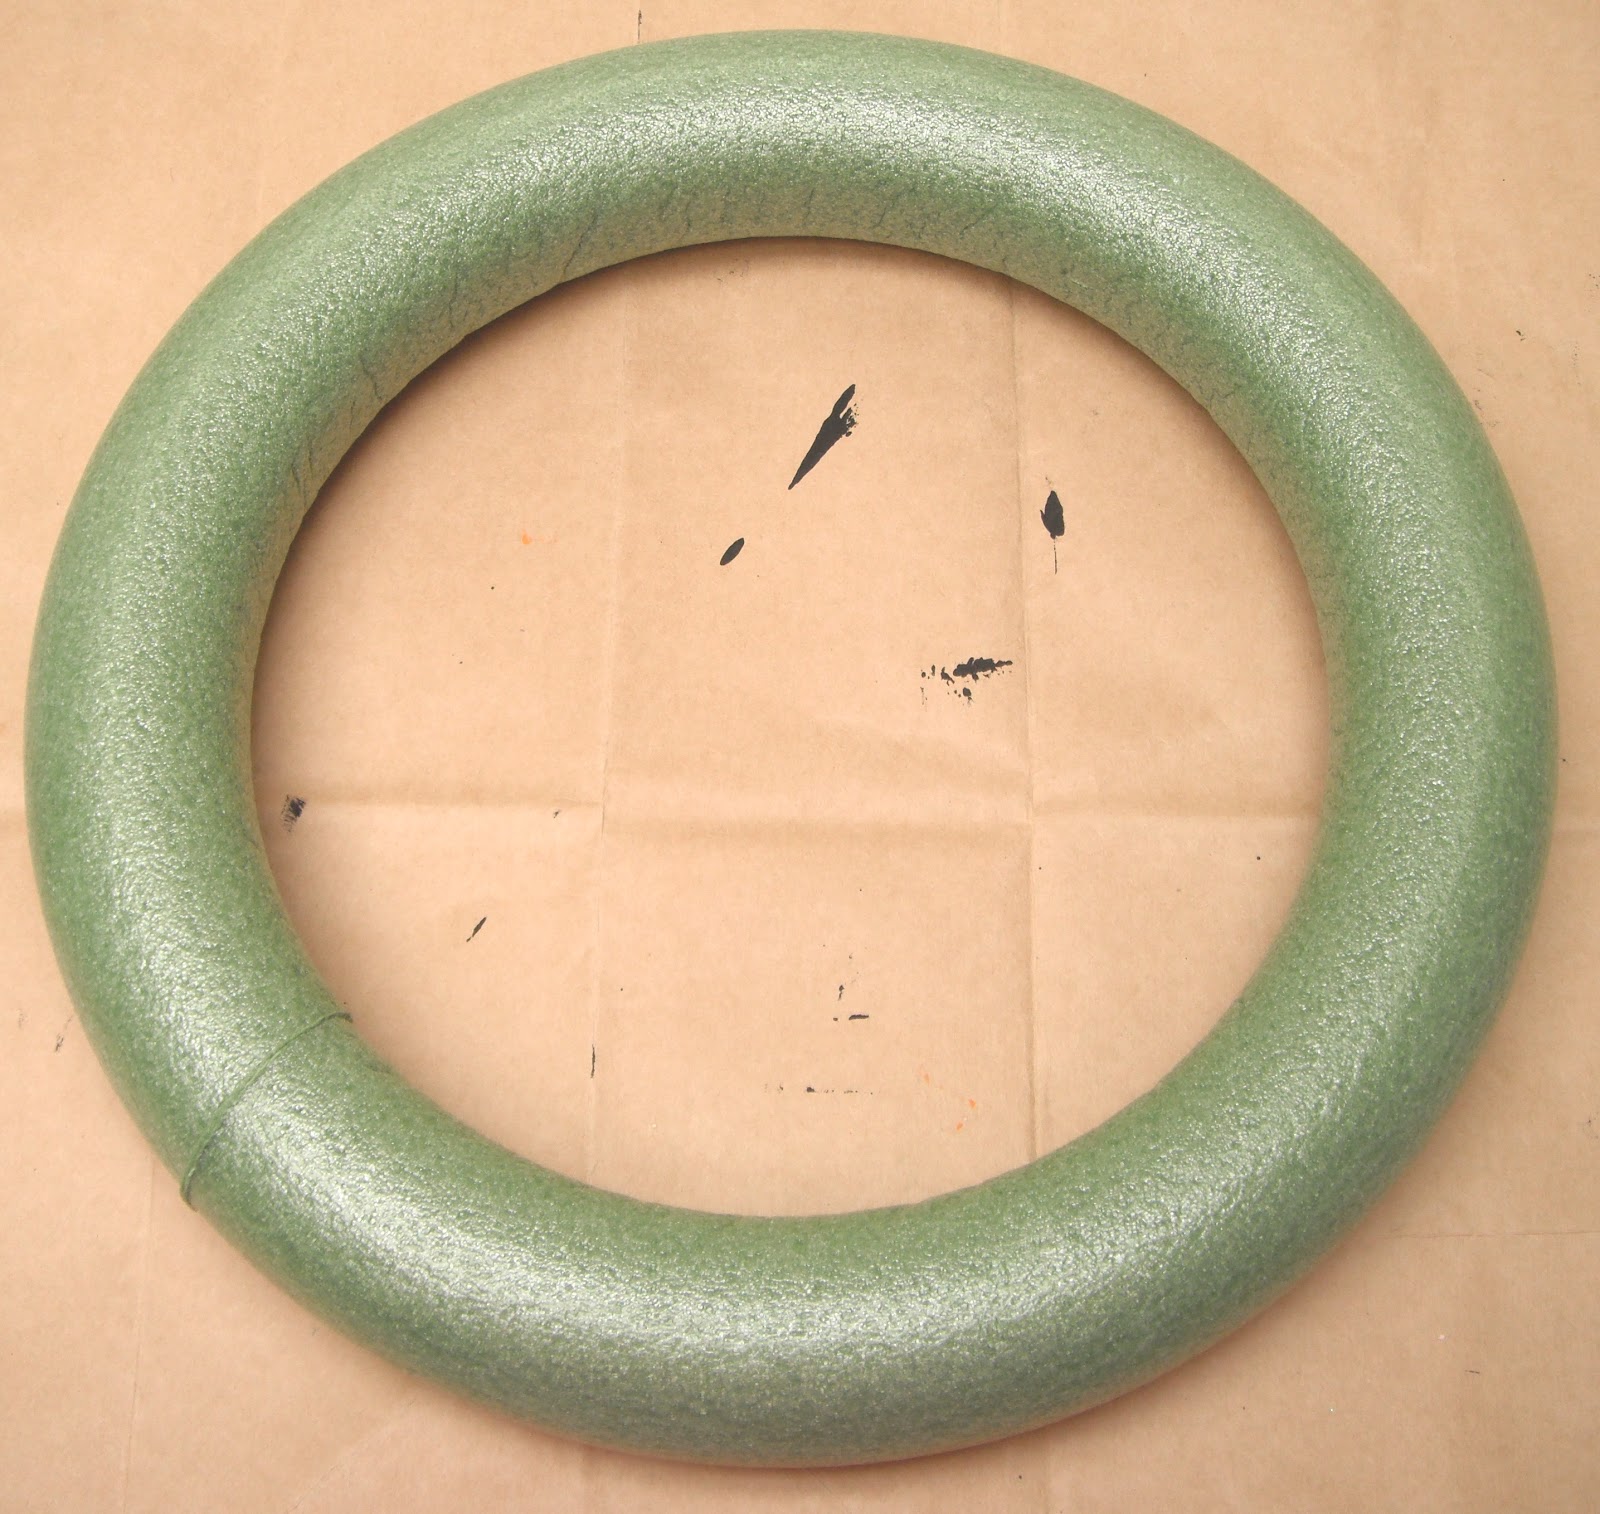
This is how my wreath started:


I took a 12 inch foam wreath form and painted it with light brown acrylic paint.  This step may not really be necessary, but I didn't want any of the green foam form peeking through the burlap, so I did this just in case.

Then I cut burlap in 1 in x 16 in strips and tied the strips around the wreath in a simple double knot.  I used about 45 strips to go all the way around the wreath.  (FYI - The tutorial I linked to said 1.25 yds of burlap in the instructions.  I bought 1.5 yards off a bolt and it was way too much!!)

Finally I cut a few Thanksgiving images from Cricut cartridges and adhered them to the wreath with hot glue.  Now it's ready to hang on the front door!!

I'm going to submit this project in the challenge over at Fantabulous Cricut.  The challenge this week is Fall Harvest - make a project using fall leaves.

Thanks for coming by to take a look!  Have a great weekend!!

Recipe:
12 inch wreath form
Brown acrylic paint
Burlap
Happy Thanksgiving from Lyrical Letters cut at 3 inches
Frame from Elegant Edges cut at 5 x 8 inches
Leaves from Celebrate with Flourish cut at 3.5 inches
Turkey from Create a Critter 2 cut at 3.75 inches