Good evening everyone! Over at My Pink Stamper, there is a big 12 Days of Christmas celebration going on. The project that I have to share tonight fits perfectly for her day 5 challenge. The challenge is to make a gift card or money holder.
I got the idea for this gift card holder HERE and modified it so that it would fit into a standard A2 card. After getting my A2 card base, I took a piece of 5 1/2 x 11 cardstock and scored it at 4, 5 1/2 and 7 inches. I then zigzag folded that piece of cardstock so that the middle section would stick out into the center of my card. To make the slot for the gift card, I simply took an exacto knife and made a slit along the fold just a little larger than the height of the gift card. I adhered this folded piece of cardstock into my card base and decorated the front. Pretty simple!
Thanks for stopping by and be sure to join in the 12 Days of Christmas fun over at My Pink Stamper!
Recipe:
Cardstock from Bazzill
Snowflake from Christmas cut at 3 3/4 inches
Snowflake embossing folder
Ribbon from my stash
Sentiment from Hero Arts Holiday Sayings set
Wednesday, December 21, 2011
Sunday, December 18, 2011
Cupcakes!
Hello everyone! I hope you had a wonderful weekend!! Mine was busy, but a lot of what kept me busy today was crafting so I can't complain! Only one more week til Christmas - are you ready yet?!?
My sweetie's father hosts a Christmas caroling party every year, which we attended yesterday. Family and friends get together, then we drive to a couple of nursing homes in the area and a couple of homes of older friends of the family to sing Christmas carols. I am in no way a singer, but I enjoy this event every year. It's nice to see the joy on the faces of the people in the homes and they are always very thankful that we came to visit.
After we make our caroling stops, we all head back to my sweetie's father's house to eat and spend time together. This year I decided to make chocolate cupcakes with peppermint icing and I sprinkled crushed up candy canes on top. I found the recipe for these by searching on the internet and of course now don't remember where I found them. I apologize for not being able to give anyone the credit they are due - and they deserve it because the cupcakes were a hit! Here's the recipe for anyone who's interested. Thanks for coming by!
Chocolate Cupcakes
1 cup sugar
1 cup brown sugar (not packed)
1 3/4 cup flour
3/4 cup cocoa powder
1 1/2 tsp baking soda
1 1/2 tsp baking powder
1/2 tsp salt
2 eggs
1 cup milk
1/2 cup vegetable oil
2 tsp vanilla
1 cup boiling water
Sift dry ingredients into a mixing bowl. Add eggs, milk, oil and vanilla. Beat with a mixer for about 2 minutes, occasionally scraping the sides of the bowl with a rubber spatula. Add the boiling water and beat, just until blended. Don't be alarmed - the batter appears watery. Pour the batter into lined cupcake pan. Bake for 20-25 minutes at 350 degrees, until the center of the cupcakes spring back when lightly touched.
Peppermint Icing
1 cup (2 sticks) butter of margarine, room temperature
1/2 tsp vanilla
1 1/2 tsp peppermint extract
4 cups powdered sugar
2 tsp to 2 tbsp milk
Beat the butter until pale and fluffy. Add the vanilla and the peppermint extract and mix well. Add the powdered sugar 1 cup at a time, making sure the icing is smooth before adding the next cup. After all of the powdered sugar is incorporated, beat in the milk one teaspoon at a time until the desired consistency is reached (I used about 3 tsp).
My sweetie's father hosts a Christmas caroling party every year, which we attended yesterday. Family and friends get together, then we drive to a couple of nursing homes in the area and a couple of homes of older friends of the family to sing Christmas carols. I am in no way a singer, but I enjoy this event every year. It's nice to see the joy on the faces of the people in the homes and they are always very thankful that we came to visit.
After we make our caroling stops, we all head back to my sweetie's father's house to eat and spend time together. This year I decided to make chocolate cupcakes with peppermint icing and I sprinkled crushed up candy canes on top. I found the recipe for these by searching on the internet and of course now don't remember where I found them. I apologize for not being able to give anyone the credit they are due - and they deserve it because the cupcakes were a hit! Here's the recipe for anyone who's interested. Thanks for coming by!
Chocolate Cupcakes
1 cup sugar
1 cup brown sugar (not packed)
1 3/4 cup flour
3/4 cup cocoa powder
1 1/2 tsp baking soda
1 1/2 tsp baking powder
1/2 tsp salt
2 eggs
1 cup milk
1/2 cup vegetable oil
2 tsp vanilla
1 cup boiling water
Sift dry ingredients into a mixing bowl. Add eggs, milk, oil and vanilla. Beat with a mixer for about 2 minutes, occasionally scraping the sides of the bowl with a rubber spatula. Add the boiling water and beat, just until blended. Don't be alarmed - the batter appears watery. Pour the batter into lined cupcake pan. Bake for 20-25 minutes at 350 degrees, until the center of the cupcakes spring back when lightly touched.
Peppermint Icing
1 cup (2 sticks) butter of margarine, room temperature
1/2 tsp vanilla
1 1/2 tsp peppermint extract
4 cups powdered sugar
2 tsp to 2 tbsp milk
Beat the butter until pale and fluffy. Add the vanilla and the peppermint extract and mix well. Add the powdered sugar 1 cup at a time, making sure the icing is smooth before adding the next cup. After all of the powdered sugar is incorporated, beat in the milk one teaspoon at a time until the desired consistency is reached (I used about 3 tsp).
Friday, December 16, 2011
Shower Thank Yous
Happy Friday! Last weekend, one of my best friends threw a bridal shower/bachelorette party for me. She did a fantastic job on everything, from the invitations, decorations, favors.... she even made the cake and made me a book for all the pictures and cards. Click HERE to see her posts from some of the things she did for the party. She knew the colors we're using for our reception and matched everything perfectly. It was a great party - everything I wanted and more!
These are the thank you cards that I made to send to everyone. I used the same colors that were used for the invitations and favors. I decided to do some simple variations on the same design to make it a little easier on my part. Thanks for stopping by!
Recipe:
Cardstock from Bazzill
Swiss Dots and Spots & Dots embossing folders
American Crafts ribbon in Pool and Leaf
Thank You stamp and white embossing powder
Glossy Accents
These are the thank you cards that I made to send to everyone. I used the same colors that were used for the invitations and favors. I decided to do some simple variations on the same design to make it a little easier on my part. Thanks for stopping by!
Recipe:
Cardstock from Bazzill
Swiss Dots and Spots & Dots embossing folders
American Crafts ribbon in Pool and Leaf
Thank You stamp and white embossing powder
Glossy Accents
Thursday, December 15, 2011
Christmas Tags
Can you believe that Christmas is only 10 days away?? I sure can't! I'm pretty sure I'm finished shopping, but I haven't wrapped anything and still haven't finished my Christmas cards. Needless to say, I know what I'll be doing this weekend!!
Even though I feel like I still have a mountain of things to do before Christmas, I have managed to get a few things crossed off my list. One of those things is some gift tags. Here are four tags I created to add to packages..... when I finally get them wrapped that is! LOL!
Cardstock from Bazzill, Recollections and DCWV
Round tag from Tags, Bags, Boxes and More cut at 4 inches
Rectangle tag from Tags, Bags, Boxes and More cut at 4.2 inches
Stocking from Jolly Holidays cut at 2 inches
Ornament from Jolly Holidays cut at 2.25 inches
Tree from Celebrate with Flourish cut at 2.75 inches
Wreath from Celebrate with Flourish cut at 4 inches
To and From sentiments from Pink by Design's Christmas Wishes set
Glitter, Glossy Accents, gems and ribbon from my stash
Thursday, December 8, 2011
Lake Trip LO
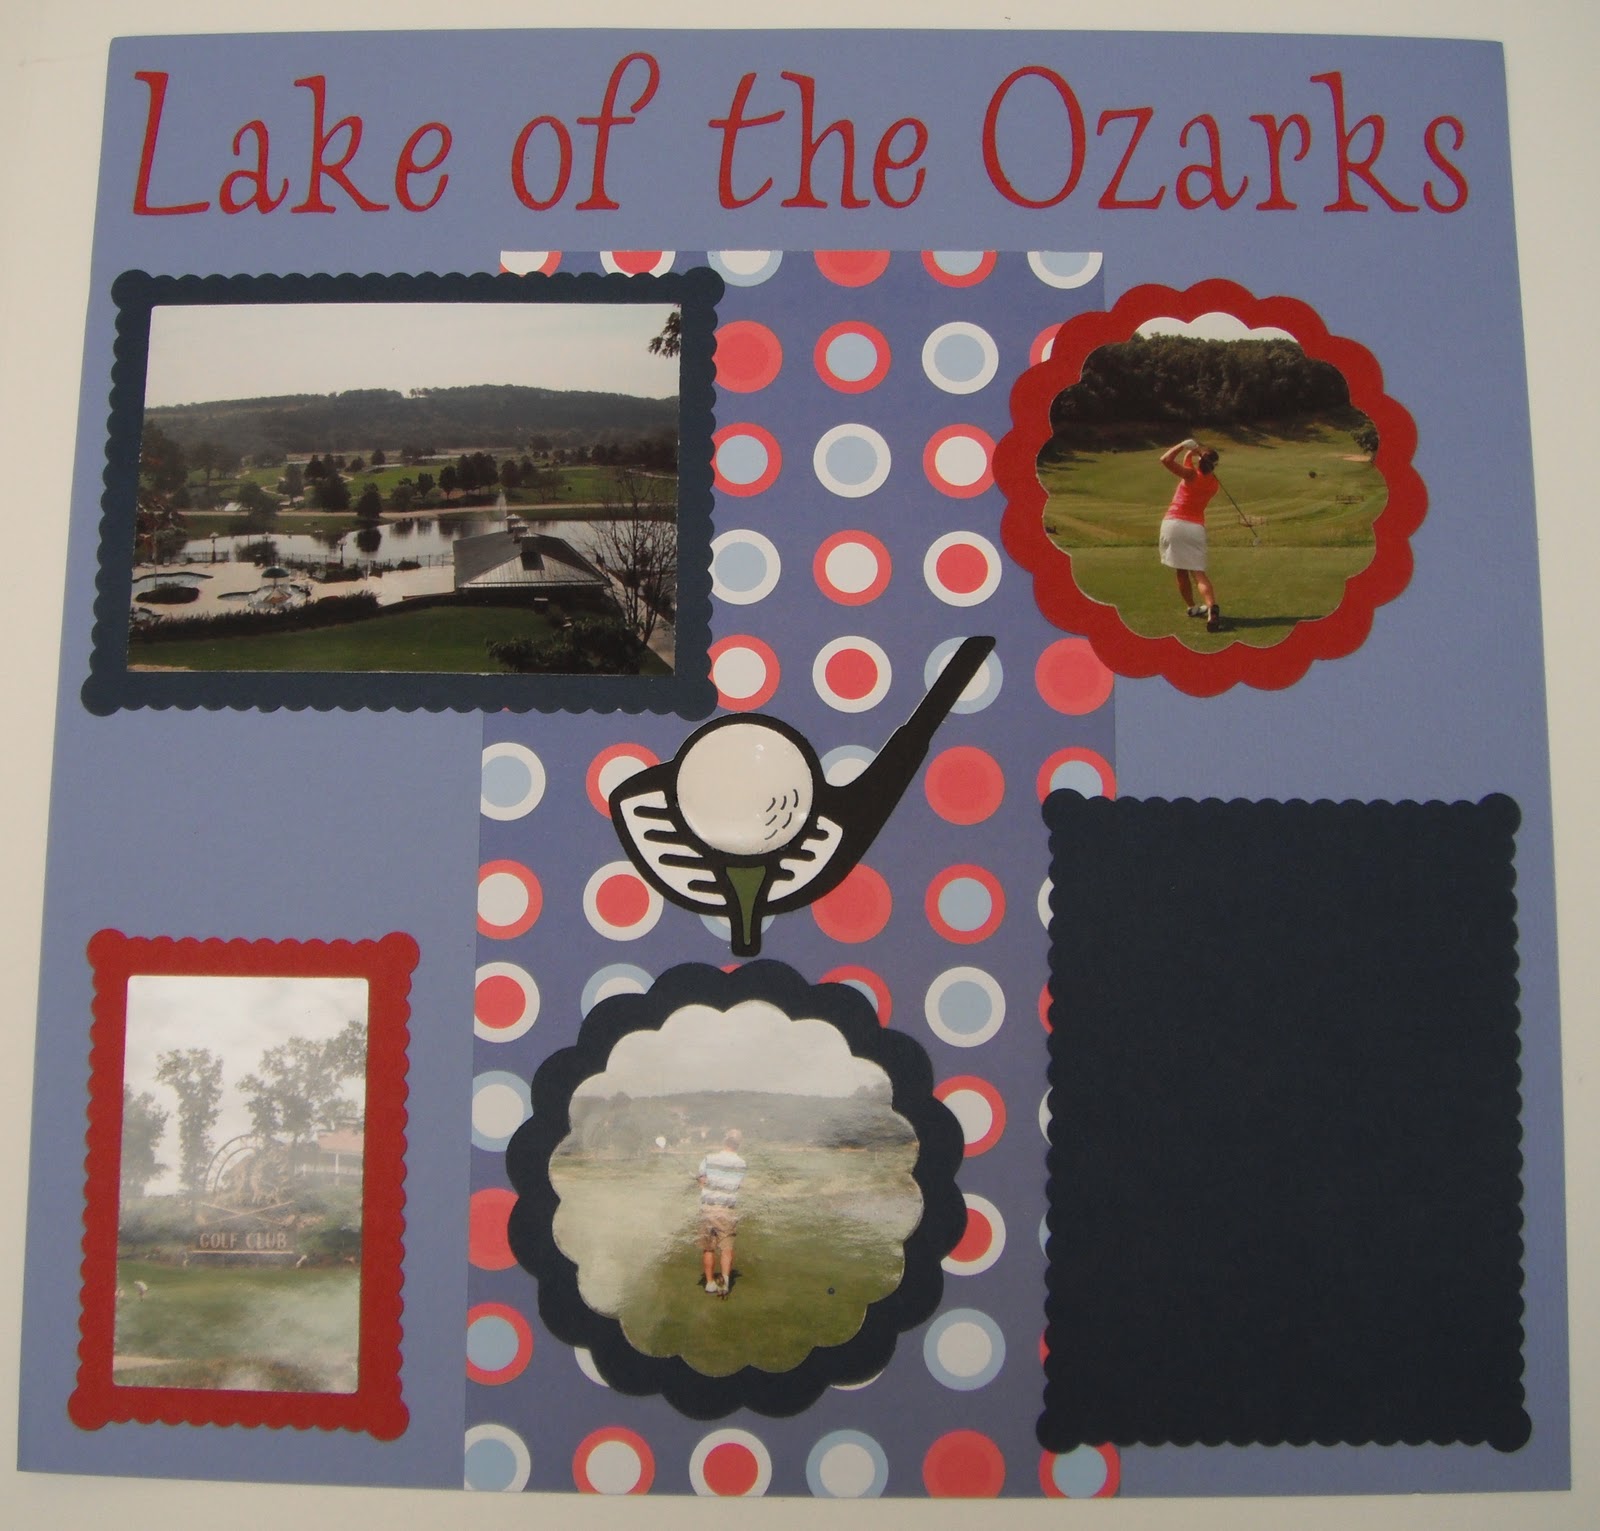
Good evening everyone! I'm trying very hard to get caught up on my layouts before the year is over. I'm getting married in January, so with the wedding, reception and everything else that goes along with those I know I will be very busy for quite a while - and I have a lot of wedding-related crafting projects on the to-do list as well. So, I'd like to be caught up on my scrapbook layouts for the year (if at all possible!) before the wedding.
Which brings me to tonight's project..... My sweetie and I spent Fourth of July weekend at the Lake of the Ozarks with some of his aunts, uncles and cousins. We spent time out on the lake and in the pool, and managed to get a round of golf in as well. We had a great time - it's always fun to get away for a long weekend! I borrowed some die cuts from my great friend Melissa to cut out the pictures and mats, so I'm sorry but I don't know the name of them. The empty blue mat is for my journaling. Thanks for stopping by to take a look!!
Recipe:
Solid cardstock from Bazzill and Recollections
Patterned cardstock from The Paper Studio
Title and date from Lyrical Letters cut at 1 1/2 inches
Golf ball and boat from Father's Day cut at 2 1/2 inches
Glossy accents on golf ball and red stripe on boat
Which brings me to tonight's project..... My sweetie and I spent Fourth of July weekend at the Lake of the Ozarks with some of his aunts, uncles and cousins. We spent time out on the lake and in the pool, and managed to get a round of golf in as well. We had a great time - it's always fun to get away for a long weekend! I borrowed some die cuts from my great friend Melissa to cut out the pictures and mats, so I'm sorry but I don't know the name of them. The empty blue mat is for my journaling. Thanks for stopping by to take a look!!
Recipe:
Solid cardstock from Bazzill and Recollections
Patterned cardstock from The Paper Studio
Title and date from Lyrical Letters cut at 1 1/2 inches
Golf ball and boat from Father's Day cut at 2 1/2 inches
Glossy accents on golf ball and red stripe on boat
Friday, December 2, 2011
MCS Monday Challenge #35
Hello everyone and happy Friday!! I'm really looking forward to this weekend. Work was stressful this week, so I'm definitely ready for a break for a couple of days. I also have a scrap night planned with one of my best friends, which is always great - crafting and girl time....gotta love it!
The project I have to share tonight is a Christmas card that I created for 2 reasons. One was so that I could send another card to Madison's I Feel the Love Project. Click HERE for more information on that. The second reason I created this card is for the Monday Challenge over at My Craft Spot. The challenge this week is 'Christmas Through the Window' - to create a Christmas card or project with a window. Christmas cards are always fun for me, but adding a window.....that's something I don't do very often. What a great challenge! Thanks for stopping by to take a look!
Recipe:
Solid cardstock from Bazzill and Recollections
Patterned cardstock from Heidi Grace Designs
5x5 card base
Scallop square from Slumber Party cut at 3.75 inches
4.75x4.75 frame layer with same scallop square cut at 4 inches
Presents from Jolly Holidays cut at 1.5 inches
Santa from Jolly Holidays cut at 3 inches
Sentiment from Pink by Design's Christmas Wishes set
Glossy Accents on Santa's belt and boots
Stickles
The project I have to share tonight is a Christmas card that I created for 2 reasons. One was so that I could send another card to Madison's I Feel the Love Project. Click HERE for more information on that. The second reason I created this card is for the Monday Challenge over at My Craft Spot. The challenge this week is 'Christmas Through the Window' - to create a Christmas card or project with a window. Christmas cards are always fun for me, but adding a window.....that's something I don't do very often. What a great challenge! Thanks for stopping by to take a look!
Recipe:
Solid cardstock from Bazzill and Recollections
Patterned cardstock from Heidi Grace Designs
5x5 card base
Scallop square from Slumber Party cut at 3.75 inches
4.75x4.75 frame layer with same scallop square cut at 4 inches
Presents from Jolly Holidays cut at 1.5 inches
Santa from Jolly Holidays cut at 3 inches
Sentiment from Pink by Design's Christmas Wishes set
Glossy Accents on Santa's belt and boots
Stickles
Thursday, December 1, 2011
I Feel the Love - November/December
Good evening! Can you believe it's already December?!? I sure can't! Where has the year gone??
The project I have to share tonight is a Christmas card I made for the I Feel the Love project for November and December. Madison is collecting Christmas cards that will be taken to the Pediatric Oncology Unit at Kaiser Hospital in Oakland, CA, where they will be delivered to children who are spending this Christmas in the hospital. Please visit Madison's blog HERE for more information about the project. I think Madison's project is so touching and inspirational and hope that all of you can find some time to participate. Thanks for coming by!
Recipe:
Solid cardstock from Bazzill and Recollections
Patterned cardstock from The Paper Studio
Reindeer from Winter Frolic cut at 3.25 inches
String of lights from Create a Critter cut at 1.8 inches
Sentiment from Pink by Design's Christmas Wishes set
Google eye and Stickles
The project I have to share tonight is a Christmas card I made for the I Feel the Love project for November and December. Madison is collecting Christmas cards that will be taken to the Pediatric Oncology Unit at Kaiser Hospital in Oakland, CA, where they will be delivered to children who are spending this Christmas in the hospital. Please visit Madison's blog HERE for more information about the project. I think Madison's project is so touching and inspirational and hope that all of you can find some time to participate. Thanks for coming by!
Recipe:
Solid cardstock from Bazzill and Recollections
Patterned cardstock from The Paper Studio
Reindeer from Winter Frolic cut at 3.25 inches
String of lights from Create a Critter cut at 1.8 inches
Sentiment from Pink by Design's Christmas Wishes set
Google eye and Stickles
Subscribe to:
Posts (Atom)