Tuesday, December 25, 2012

Merry Christmas!!

Merry Christmas!!  I'm so happy to be spending this holiday with my sweetie and our parents.   My parents moved to Arizona almost 2 years ago.  That was the first time I have lived more than 30 minutes from my parents, outside of my college years, so it was very difficult for me.  I love when we're able to spend time together!

I thought I would share the cards I sent out for Christmas this year to friends and family.  I go in to the holidays thinking I need to make a simple card to send since we send out nearly 60 cards, and inevitably it ends up more complex and time consuming than I was planning.  Does that happen to you??

I just love Peachy Keen face stamps and knew I had to use one of the faces from the Winter Faces Assortment I got not too long ago.  I think those faces add so much character!!


I wish you all a safe and wonderful holiday!  Thanks for stopping by!

Recipe:
Shimmer cardstock from DCWV and Core'dinations
Solid cardstock from Recollections
Snowflakes embossing folder
Snowman from Winter Frolic cut at 3.5 inches
Sentiment from Pink by Design's Christmas Wishes set
American Crafts ribbon
Crystal gems

Monday, December 24, 2012

Christmas Bag and Tags

Merry Christmas Eve!  Do you all have fun plans with family/friends today and tomorrow??  We are spending time this evening with my sweetie's extended family and tomorrow we are hosting Christmas dinner for our parents.  I'm so excited to have my parents in town for the holiday and am looking forward to spending time in the kitchen with my mom preparing the meal.

I thought I would share some of the tags I made and also a coordinating gift bag.  I kept them all pretty simple, using my Santa's Village Imagine cartridge.


All of the tags are from Plantin Schoolbook.  I filled them with various patterns from Santa's Village and cut out coordinating images that I adhered with pop dots.


For the gift bag, I printed a 6x8 rectangle with a pattern from Santa's Village and again cut out a coordinating image.


Like I said, pretty simple!!  Thanks for coming by to take a look and enjoy your Christmas Eve!!

Recipe:
Pattern papers from Santa's Village Imagine cartridge
Tags from Plantin Schoolbook cut at 4 inches
Penguins from Simply Charmed cut at 2 inches
Candy Cane from Simply Charmed cut at 2.25 inches
All other images from Santa's Village cut at 2 or 2.25 inches

Wednesday, December 19, 2012

Christmas Luminary

Good evening!  Are you all ready for Christmas??  Only 6 more days!  I made a couple of stops on my way home from work today and picked up a couple gifts.  I *think* I'm finished shopping. :-)

The project I have to share today was a pretty quick and easy one to make.  I think I'm a little obsessed with luminaries lately, as I've been making some for all the holidays recently.  They're so easy though and a fun decoration - and who doesn't like the soft, relaxing glow of a candle.  Right?!?


For this luminary I used a spaghetti sauce jar, completely removed the label and cleaned the jar.  Then I sprayed it with 2 coats of frosted glass spray paint.  According to the can, the paint I used dries in 5-10 minutes, but I waited closer to 30 minutes before spraying the second coat.  After the paint was dry, I cut my image on Cricut vinyl and placed it on my jar.  Finally, I decorated the top of the jar with ribbons and a decorative button.  Add a tealight and turn off the lights!!


I'm going to link this up to the Christmas Party challenge over at Decorate to Celebrate.  Thanks for stopping by to take a look!

Recipe:
Jar
Frosted glass spray paint
Cricut vinyl in red and green
Wreath from Celebrate with Flourish cut at 3.25 inches
Ribbons and button from my stash

Sunday, December 16, 2012

Gift Card Holder

Good evening!  I hope you all had a nice weekend.  Mine was very busy between holiday parties and trying to get various projects wrapped up.  My Christmas cards are nearly done and just about ready to put out in the mail, and I also managed to get a gift card created.

I knew I wanted to participate in the challenge this week over at Fantabulous Cricut - Bells are Ringing.  I got some inspiration from a number of gift card holders I've seen on blogs and Pinterest recently, and also from one of the FCCB Design Team Members, Missy.


I folded a piece of 6.5" x 4.5" cardstock in half and glued the two side together, leaving the top open.


I used the Book feature of the Elegant Edges cartridge to cut the tag and punched a hole in the top, tying a bow with crinkle ribbon.  I tied a jingle bell to the bow - thanks for the idea of using an actual bell Missy!  There you go, gift card holder complete - just decorate as you wish!

Recipe:
Pattern and glitter cardstock from DCWV
Solid cardstock from Recollections
Jingle bells from Wrap it Up cut at 2.5 inches
Crinkle ribbon
American Crafts twine
Jingle bell

Wednesday, December 12, 2012

Gift Bags

Hello!  Can you believe Christmas is less than 2 weeks away?!?  Are you ready??  We are nearly finished shopping, but I've only just started our Christmas cards.  I'm hoping to get them finished up by the weekend and in the mail by Monday - wish me luck!!

Today I am sharing a gift bag I made using a tutorial I had found quite a while ago.  I have seen a number of people make bags like this, most recently Gigi over at The Cricut Bug.  You can find the tutorial for making these bags HERE.  The bags are easy to make and work perfectly for those small gifts you're giving - I'm putting soft fuzzy socks in them.


I'm going to link these up to this week's Wrap it Up challenge over at My Craft Spot and also to the Thankful Thursday Red and/or Green challenge at DL Art.  Thanks for coming by to take a look!

Recipe:
Pattern and glitter cardstock from DCWV
Snowman from Jolly Holidays cut at 3 inches
Face from Peachy Keen Stamps Winter Faces Assortment
Fiskars Threading Water border punch
Crinkle ribbon

Monday, December 10, 2012

Christmas Card Holder


Good evening!  I hope you all had a wonderful weekend and that your week is off to a good start.  My weekend was busy, but also productive - I managed to get quite a bit of crafting done!

One of the projects I completed this weekend was a Christmas card holder.  My sweetie and I didn't have a good way to display Christmas cards that we have received.  I saw a creation on Pinterest that I thought would be great - a wreath made out of painted clothes pins on wire shaped in a circle.  Have you seen the one I'm talking about?

Fun Christmas Card Wreath!!

Cute, huh?  Well, I got the clothes pins, painted them, strung them on the wire, tied my bow.....all was going fine until I tried to get it on my wall.  No luck.  I just couldn't get the clothes pins to behave, my circle turned in to an oval, and it just looked all wrong.  Ugh!  So, back to the drawing board (also known as Pinterest and Google LOL!!).  

I got some inspiration and this is what I created:


I am much happier with how this turned out!  (Sorry for the bad lighting in the pics - it's been cloudy here the past few days so the light wasn't good).  I cut the frame shape twice out of thicker cardstock and glued the ribbon that will hold the cards between the two pieces.  To hang my sign, I punched two holes with my Crop-A-Dile Big Bite and reinforced them with eyelets, then tied a ribbon through them to create my hanger.  

I am going to link this up to the Holiday Choice challenge over at Decorate to Celebrate.  Thanks for coming by to take a look!

Recipe:
Solid cardstock from Recollections
Pattern and glitter cardstock from DCWV
Frame and shadow from Elegant Edges cut at 11 inches
Seasons Greetings from Celebrate with Flourish cut at 4 inches
Presents from Winter Frolic cut at 2 inches
Ornament from Winter Frolic cut at 2.3 inches
Stocking from Jolly Holidays cut at 2.3 inches
i-rock gems
White Sakura gel pen
Ribbon 

Friday, December 7, 2012

Christmas Gift Bag

Good evening!  I've had a busy week at work and have been trying to get various things done around the house this week, so I haven't been able to craft too much.  What's new, right?!?

Well, my brother is coming to visit tomorrow and I'm hoping to have all the Christmas presents for his family wrapped and ready to go so that I can send them home with him when he leaves.  I have the packages wrapped, but I needed a gift bag for one of the gifts we're giving my niece.  I dusted off my Imagine and got to creating!!


This is the first time I've attempted to fill an image from a regular Cricut cartridge with a pattern from an Imagine cartridge.  Very easy - something I will definitely need to keep in mind for future projects!!

I'm going to enter this bag into Holiday Spirit challenge over at Die Cuttin Divas.  Now I'm off to try to get started on my tags so I can get these packages finished up!!  Thanks for stopping by!

Recipe:
Kraft bag
EK Success snowflake border punch
Pattern papers printed from Christmas Wish Imagine cartridge
Mittens from Simply Charmed cut at 4 inches
Glitter
Buttons from my stash
Twine from My Craft Spot

Tuesday, December 4, 2012

IFTL Christmas Cards

Good evening!!  Have you all been busy preparing for the holidays??  I love this time of year!  It's a little hard getting in to the spirit though because where I live we're experiencing unseasonably warm weather.  I'm not used to 60+ degree temps in December!  I definitely want at least some snow this year (perhaps a white Christmas?!?), and I would also like some colder weather so that I can get some use out of the scarves and hats I've crocheted this fall!

My weekend turned out to be a bit busier than I'd expected so I didn't get to spend much time crafting.  I did get some time last night though and I created a couple of Christmas cards to send to Madison's I Feel the Love project.  If you aren't familiar with her project, please visit her blog HERE.  She is collecting Christmas cards that will be taken to Children's Hospital Central California and delivered to children who will be spending the holidays there.


I think Madison has such a wonderful heart and collects cards for wonderful causes.  Thank you Madison!!  You still have time to send some cards Madison's way!!

Recipe:
Solid cardstock from Bazzill and Recollections
Pattern paper from Heidi Grace Designs
Santa puppy from Create a Critter 2 cut at 3.5 inches
Bird with presents from 3 Birds on Parade cut at 3.5 inches
Twine from My Craft Spot
Sentiments from Pink by Design's Christmas Wishes and Hero Arts Holiday Sayings sets
White Sakura gel pen
Glitter

Friday, November 30, 2012

Another Birthday Card

Happy Friday!  Can you believe it's already the last day of November?!?  I have started my Christmas shopping, but I still have a lot of Christmas crafting I want to get done.  How about you??

I have another masculine birthday card to share with you today - and one I made with no Cricut cuts!  I cut strips of paper 1.5 inches wide, then hand cut the ends to make the banners.  I added a ribbon and sentiment to finish the card.  Very simple!  I kept looking at the card wanting to add something, but was afraid anything I added would end up being too much - or too girly!!

Thanks for coming by to take a look!  I hope you all have a wonderful weekend!

Recipe:
Solid cardstock from Bazzill and Recollections
Pattern cardstock from DCWV
Ribbon from my stash
Sentiment from Scrappy Mom's Everyday Greetings set

Thursday, November 29, 2012

Birthday Card

Good evening!  I don't know where this past week has gone!!  I managed to get all our Christmas decorations up over the weekend and there are a few other projects my sweetie and I have been working on around the house, so the time is just flying by!!

There are a couple birthdays in my family this week, and they are both guys.  As you may remember from previous posts, I struggle with masculine birthday cards.  I think I did okay with these ones though - what do you think??

Here is the first one I made:


I kept it pretty simple and the only bling I added was the Stickles on the candle flames.  :-)  I'll be back to share the second card with you soon - hopefully tomorrow!!  Thanks for coming by to take a look!

Recipe:
Cardstock from Bazzill and Recollections
Candles from Birthday Bash cut at 2.75 inches
Sentiment from Scrappy Mom's Everyday Greetings set
Twine from My Craft Spot
Stickles

Thursday, November 22, 2012

Happy Thanksgiving!

Happy Thanksgiving!  In my mind, the holiday season officially begins today.  This also means that I get to pull all my Christmas decorations out and start decorating the house.  As my sweetie so lovingly says, "It looks like Santa threw up in here."  I take that as a compliment and think that he's really trying to tell me how festive the house looks.  LOL!!  I love Christmas and all the decorations that go along with the holiday.  I have a few new creations in mind that I hope to be sharing with you soon!

But first, I have one more Thanksgiving card to share.  I'm going to submit this in the challenge over at Die Cuttin Divas, where the challenge is Thanksgiving!


I hope you were able to spend the holiday with friends or family, and that we are all reminded of the blessings surrounding us and all that we have to be thankful for.  Have a wonderful Thanksgiving!!

Recipe:
Solid cardstock from Bazzill and Recollections
Pattern paper from The Paper Studio
Pilgrim Squirrel from Create a Critter 2 cut at 3.5 inches
Sentiment from My Pink Stamper's Happiest Moments set
Ribbon from The Paper Studio
i-rock gems
White Sakura gel pen
Stickles
Google eyes

Tuesday, November 20, 2012

Bad to the Bone

Hello!  Are you all having a great week so far?  How many of you have the rest of the week of for Thanksgiving??  Not me - I only get Thanksgiving Day off.  No complaints though - I'll take it!!  :-)

The card I'm sharing this evening is one I made for a good friend of mine at work.  He is very in to skulls - his cube looks like it is decorated for Halloween all year round!  He also likes to listen to music while he is working, so most of the time he has headphones on.  I try to makes my cards fit their recipient whenever possible and his birthday cards are always a challenge for me.  I managed to find this image on the Rock Princess cartridge though, and with a slight modification, I think it worked.  The image has flourishes coming out on the sides.  I cut those off from the image and from the shadow layer in an attempt to make the image a little more masculine.  He loved the card, so I guess it worked!


Thanks for coming by to take a look!

Recipe:
Solid cardstock from Bazzill and Recollections
Pattern paper from DCWV
Skull and headphones from Rock Princess cut at 3.5 inches
Sentiment from Pink by Design's Rock On set

Sunday, November 18, 2012

Another Thanksgiving Card

Happy Sunday!  Are you all having a good weekend?  And are you ready for Thanksgiving in just a few days?!?  I have a couple more cards I need to make, and I'm planning to get those finished up today so they can go out in the mail tomorrow.

This week over at Fantabulous Cricut the challenge is Pilgrim's Progress - make a project using a Pilgrim/Indian or something from the First Thanksgiving.  I used this challenge to help inspire one of my Thanksgiving cards.


Thanks for coming by to take a look at my card.  Enjoy the rest of your weekend!!

Recipe:
Solid cardstock from Bazzill and Recollections
Pattern paper from The Paper Studio
Pilgrim Hat from Celebrate with Flourish cut at 3.25 inches
Ribbon from The Paper Studio
White Sakura gel pen

Thursday, November 15, 2012

First Thanksgiving Card

Good evening!  Thanksgiving is only 1 week away which means I need to get to work on my Thanksgiving cards so I can get them in the mail.  Nothing like procrastinating!!

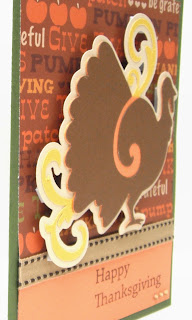
I made this card to fit with this week's challenge over at Die Cuttin Divas.  Their challenge this week is a color challenge - use brown, orange, yellow and one other color.  I chose green to be my fourth color because it appears in the pattern paper, but I realized when I put the turkey on the card that nearly all of the green is covered up.  Oh well!!


Thanks for coming by to take a look and I hope you are all a little further along in your Thanksgiving preparations than I am!  :-)

Recipe:
Solid cardstock from Bazzill and Recollections
Pattern paper from The Paper Studio
Turkey from Celebrate with Flourish cut at 3.4 inches
Sentiment from My Pink Stamper's Happiest Moments set
Ribbon from The Paper Studio
Orange crystal gems

Tuesday, November 13, 2012

Anniversary Card

Good evening!  Can you believe it's already the middle of November and Thanksgiving is next week?!?  I sure can't!!  Looks like I better get my Thanksgiving cards made this week!!

The card I have to share tonight is the one I made for my sweetie's father and his wife who celebrated their first anniversary this past weekend.  I wanted to keep the card pretty simple and I wanted to incorporate the colors from their wedding.  No Cricut images on this card which is pretty rare for me!


Thanks for coming by to take a look!

Recipe:
Cardstock from Bazzill
Swirly Vines w/Hearts embossing folder
Martha Stewart Double Loops border punch
American Crafts ribbon
i-rock gems
Sentiment from My Craft Spot's Always & Forever set
Black embossing powder

Saturday, November 10, 2012

Thanksgiving Wreath

Happy Saturday!  Are you all enjoying the weekend so far??  We are having wonderful weather here, though it is a bit windy!  I had a nice run this morning with one of my good friends and then my sweetie and I played in a golf tournament with another good friend of ours.  Got a few chores done and then I got to finish the project I'm sharing with you today.  So far my weekend is going great!  :-)

I saw a terrific Halloween wreath on Pinterest a while back and decided to make a Thanksgiving version to hang on our front door.  Check out the Halloween wreath I found HERE - very neat!

This is how my wreath started:


I took a 12 inch foam wreath form and painted it with light brown acrylic paint.  This step may not really be necessary, but I didn't want any of the green foam form peeking through the burlap, so I did this just in case.

Then I cut burlap in 1 in x 16 in strips and tied the strips around the wreath in a simple double knot.  I used about 45 strips to go all the way around the wreath.  (FYI - The tutorial I linked to said 1.25 yds of burlap in the instructions.  I bought 1.5 yards off a bolt and it was way too much!!)

Finally I cut a few Thanksgiving images from Cricut cartridges and adhered them to the wreath with hot glue.  Now it's ready to hang on the front door!!

I'm going to submit this project in the challenge over at Fantabulous Cricut.  The challenge this week is Fall Harvest - make a project using fall leaves.

Thanks for coming by to take a look!  Have a great weekend!!

Recipe:
12 inch wreath form
Brown acrylic paint
Burlap
Happy Thanksgiving from Lyrical Letters cut at 3 inches
Frame from Elegant Edges cut at 5 x 8 inches
Leaves from Celebrate with Flourish cut at 3.5 inches
Turkey from Create a Critter 2 cut at 3.75 inches

Tuesday, November 6, 2012

Running Thank You


Happy Election Day!  Did everyone get out and vote today??  I hope so!!  I'm very interested to see how this election turns out, but I will admit I'm also very ready for all the political commercials, mailings, etc to come to an end.  My sweetie is glued to the tv watching the election result coverage and I am nearby working on some crafts and keeping an eye on the tv as well.

This past weekend, one of my running friends hosted a Breakfast Run from her house.  Our usual Saturday morning running club was not meeting so she decided to invite a group of people over to run and have breakfast.  She even set water out for us along the route so we didn't have to carry bottles with us.  It was so nice of her to organize this run and she remembered all the small details!  I just had to make a thank you card for her to let her know how much I appreciate her organizing this.

Die Cuttin Divas is having a sketch challenge this week and I used the sketch for inspiration in creating this thank you card.  Here is the sketch:

And here is the card I created:


Thanks for stopping by to take a look!  I hope everyone's week is off to a good start!!

Recipe:
Solid cardstock from Bazzill and Recollections
Pattern cardstock from DCWV
Frame and border from Elegant Edges cut at 3 inches
Runner from Pink Journey cut at 2.45 inches
Rub-on sentiment
i-rock gems

Wednesday, October 31, 2012

Halloween Treat Bags

Happy Halloween!  Are you ready for the trick-or-treaters??  We have our luminaries out and a bowl full of candy, so bring on the kids!!

My sweetie and I have become pretty good friends with a couple of our neighbors who have 2 little ones.  I wanted to do something a little special for them for Halloween so I put together little treat bags for them.


I kept them pretty simple since they're going to kids.  I figure they'll be ripped off pretty quickly to get to the treats inside!  :-)


I'm going to link these up to a couple of challenges.  Over at My Craft Spot, the challenge is Too Cute to Spook - any cute Halloween Project.  And over at Fantabulous Cricut the challenge is Seeing Spots - any project using polka dots.

Thanks for coming by to take a look and I hope you enjoy your Halloween night!!

Recipe:
Solid cardstock from Bazzill and Recollections
Pattern paper from The Paper Studio
Owl and bear from Create a Critter 2 cut at 2.75 inches
Sentiments from My Pink Stamper's Spook-alicious set
Black embossing powder
Black and white Sakura gel pen
Orange crystal gems
Glitter

Tuesday, October 30, 2012

Collegiate Crafts

Good evening!  I hope you are all having a great week so far.  Can you believe October ends tomorrow??  I am definitely not ready for the holidays, but they are right around the corner!!

As some of you may know, I am an Iowa State grad and my sweetie has been a Missouri Tigers fan for as long as he can remember.  We really enjoyed when our teams would meet for a football or basketball game but now Mizzou is in the SEC so our teams meeting will no longer happen during the regular season.


 A couple months ago I took up crocheting and have been working on a number of projects.  When I was at our local J's recently I saw yarn geared toward school teams.  I found some in black and gold for my sweetie and red and gold for me and made both of us hats.  We wore them to the football game we went to last weekend and they worked great!


I have been wanting to make an ISU-MU blanket for us to share for quite a while.  I found the MU fleece on sale at our local J's quite a while back but it took some searching to find coordinating ISU fleece on sale.  I finally found it and put together our blanket!  I made a simple no-sew blanket putting the wrong sides of the fleece together and trimming them so they were the same size.  I then cut 6-inch long slits about 1 1/2 inches wide around all 4 edges.  Tie the two sides together in knots and there you have it!


The blanket is MU on one side and ISU on the other.  Of course now we fight over who gets to use the blanket and which side is up!  LOL!!

Thanks for coming by to take a look at my collegiate crafts!!

Sunday, October 28, 2012

If the Crown Fits.....

Good evening!  I hope you have all had a great weekend!  My sweetie and I went to Ames, IA to cheer on my Iowa State Cyclones as they played Baylor in their homecoming game.  We had a great time with some friends and were thankful that it wasn't too terribly cold for the game.  And the Cyclones won, so that was the icing on the cake!!

While we were gone, we missed a close friend's daughter's birthday party.  We stopped by a couple days early to drop off her birthday card and gift.  She had a Princess and the Pop Star themed birthday party.  I went to my Rock Princess handbook and started looking at images in an effort to find something that would work for her party.  This is what I selected:

Looks like a princess mixed with a pop star to me with the crown on her head!  LOL!!

I'm going to submit this card into the challenge over at Die Cuttin Divas.  The challenge this week is Glimmer, Shimmer, Gloss.  I added Stickles to the crown and stripes on the girl's top as well as Glossy Accents to her boots and the bow in her hair.

Thanks for coming by to take a look!!

Recipe:
Solid cardstock from Bazzill and Recollections
Pattern paper from DCWV
Girl from Rock Princess cut at 3.75 inches
Sentiment from Pink by Design's Rock On set
Ribbon from The Paper Studio
Twine from My Craft Spot
Button from my stash
White Sakura gel pen
Stickles and Glossy Accents

Wednesday, October 24, 2012

BOO!

Good evening!  I hope you are all having a wonderful week!  The weather here has been warmer than usual, so we've been enjoying some extra time outside - we have to take advantage of it before it turns cold for good!!

The project I have to share tonight is a Halloween decoration I made for my front door.


I started with letters that I bought from Hobby Lobby that are about 1 inch thick and 6 inches tall.  I painted the sides and backs of the letters with black acrylic paint.


Then I traced around the letters on the back side of pattern papers and cut them out by hand.  I used Mod Podge to adhere the pattern papers to the front of the letters.


Finally I cut out various images with my cricut, stuck them on the letters and tied the letters together with orange crinkle ribbon.  Pretty easy and now we have a fun Halloween decoration for the front door!


I'm going to enter this project into two challenges.  The first is over at Go Fish, where the challenge is to create a 3D Halloween project.  I'm also going to submit this into the Little Monsters challenge at My Craft Spot where you must include a monster on your project.

Thanks for coming by to take a look at my creation!!

Recipe:
BOO letters from Hobby Lobby
Black acrylic paint
Mod Podge
Pattern papers from The Paper Studio
Solid cardstock from Bazzill and Recollections
Pumpkin from Create a Critter 2 cut at 3 inches
Spider from Doodlecharms cut at 3 inches
Ghost from Simply Charmed cut at 3.5 inches
Green monster from Create a Critter 2 cut at 3.5 inches
Bat from Simply Charmed cut at 2.5 inches
Orange monster from Mini Monsters cut at 3 inches
Faces from Peachy Keen Stamps Monster Mash Assortment