Showing posts with label Everyday Paper Dolls. Show all posts

Monday, March 17, 2014

FCCB 202 - Pinch Me! Use the Color Green

Happy Monday and welcome to another Monday challenge at FCCB!


Challenge #202 Use the Color Green

This Weeks Sponsor
Be Wild and Free stamp set

The first thing that came to mind for me when I thought of a green project was of course St. Patrick's Day since that's what today is!!  So for my project, I decided to make a St. Patty's Day card.


I made my background with tiles of two different green pattern papers.  Then I cut my shamrock from the Everyday Paper Dolls cartridge.


I tied a crinkle ribbon bow around the stem of the shamrock and dressed it up with a twine bow and a button.

Join in the fun at FCCB this week!  Link up your project that uses the color green.  Remember, to qualify for the prize, be sure to use at least 1 Cricut cut on your project and if it's not obvious, let us know what cartridge you used.  Thanks for stopping by!

Recipe:
Solid cardstock from Bazzill
Pattern cardstock from Core'dinations
Shamrock from Everyday Paper Dolls cut at 3.7 inches
Crinkle Ribbon, Twine, Button
White Sakura gel pen

Saturday, June 1, 2013

Basketball Card

Hello!  Are you all enjoying the start of your weekend?  I ran a half marathon here in town this morning with a couple of my good running friends.  Then my sweetie was nice enough to give me a pass on yard work today, so I was able to spend some time crafting.  Great Saturday, I think!!  :-)

One of the cards I needed to make was a birthday card for one of the daughters of my sweetie's best friend. She's having a basketball themed birthday party this year, so I just had to make a basketball card for her.  This is what I came up with.......


I cut the basketball from Everyday Paper Dolls.  I used the hide contour feature on my Gypsy and cut the basketball out multiple times to get the black and orange, and also a white solid circle for the backside of the card.  I decided not to weld the circle, and instead simply scored the back layer of my card base on the left hand side and adhered only that portion to the front layers.


I cut the basketball player from the Imagine Best Friends cartridge.  I mixed and matched the girl and the outfit to get a basketball player that looks a little more like the birthday girl.  I thought she needed a little something, so I tied some small twine bows around her pigtails.

I'm going to link this up to the Shaped Card challenge over at Die Cuttin Divas.  Thanks for coming by to take a look!

Recipe:
Solid cardstock from Bazzill and Recollections
Basketball from Everyday Paper Dolls cut at 8.22 inches with real dial size on
Basketball player from Best Friends cut at 5 inches
Polka Dots embossing folder
Twine from The Twinery

Sunday, September 23, 2012

Cow's it Going?

Good evening!  I hope you all had a wonderful weekend!  We had great weather for my three-day weekend and I was able to enjoy a good part of it outdoors.  I also got some crafting done!!

I made this card for one of my aunts.  She recently had one of her heart valves replaced with a cow valve.  I wanted to send her a card for her recovery and decided to take a humorous approach in hopes that it will bring a smile to her face.  My sweetie helped me come up with the idea for this card.  He suggested a cow with a heart on it, but I decided to switch is around and make the card heart shaped and put a cow on the heart.

I'm going to submit this card in the challenge over at My Craft Spot.  The challenge this week is Wild About You and you're supposed to include a wild animal on your project.  Thanks for coming by to take a look!!


Recipe:
Solid cardstock from Bazzill and Recollections
Pattern cardstock from We R Memory Keepers
Cow from Create a Critter cut at 2.4 inches
Heart from Everyday Paper Dolls cut at 5.25 inches
Banner for sentiment cut by hand
Sentiment from Scrappy Mom's Amusing Animals set
Brown chalk

Thursday, August 16, 2012

Get Well Soon Card

Happy Thursday!  I hope you are all having a fabulous week!  Mine is going well - most of all I'm looking forward to this weekend.  I have a fun scrap night planned with one of my best friends  - something we haven't done in quite a while and I can't wait!!

The card I have to share today is one I made for the girl who lives two houses down from us.  She was so excited to tell us that she was finally riding her bike without training wheels.  Well, not two days after she shared that exciting news with us, my husband saw her sitting on her front porch with her dad, and the poor girl had a cast on her foot.  He asked what happened, and what do you know??  She fell off her bike and broke her foot!!  Poor thing - so soon after finally getting those training wheels off too!

I just had to make her a card and this is what I came up with.  All the images came from the Everyday Paper Dolls cartridge.  I created the cast by cutting the 'bed' image that looks like the little pajamas with the footies.  Then I just cut off one leg and the tip of the toes and voila - a cast!  I cut the bike image out twice, once in grey and once in black, then fussy cut the tires and seat for the layers.

I'm going to submit this card into this weeks challenge over at Fantabulous Cricut, which is 2012 Olympics - make a project with a sports theme.  Thanks for stopping by to take a look at my creation!!


Recipe:
Solid cardstock from Bazzill and Recollections
Pattern cardstock from DCWV
Girl, dress, bike and crutches from Everyday Paper Dolls cut at 3.75 inches
Sentiment from Hero Arts Everyday Sayings set
Face from Peachy Keen Stamps Wide Eyed Kids Assortment
i-rock gems
Brown chalk
Black and white Sakura gel pen


Sunday, June 17, 2012

Father's Day Card #3

Happy Father's Day!  The card I am sharing today is the one I made for my dad.  He is an avid golfer and is one of the people that I can thank for my love of the game.

I saw a sketch over at Die Cuttin Divas last week, but I didn't have time to get a card created before the challenge ended.  I liked the sketch though, and decided to use it as the template for my dad's card.  I'm going to enter this card in the challenge over at Fantabulous Cricut, which is Father's Day - make a card using an outdoors theme.

Thanks for stopping by and I hope your Father's Day and weekend are wonderful!

Recipe:
Solid cardstock from Bazzill and Recollections
Pattern papers from The Paper Studio
Golf bag and clubs from Everyday Paper Dolls cut at 3.5 inches
Buttons from my stash
Black Sakura gel pen
Glossy Accents

Tuesday, May 1, 2012

Picture Frame

Happy May Day!  We've had a pretty cloudy day today.  I hope you're having better weather where you are to start the month of May!

A while back I created a picture frame for my cat.  I promised my sweetie that I would make one for his beagle as well.  Oh who am I kidding?  They're OUR animals now and they both have taken special places in our hearts.  :)  I designed this frame similar to the frame I made for the cat so that they would look good hanging near each other.

I decorated a plain white chipboard frame, painting the sides of the frame chocolate brown, adding the pattern papers and some brown ribbon over the seams.  Then I added our dog's name, a cute dog image from the Everyday Paper Dolls cartridge and covered the entire thing in Mod Podge.  Then I added a simple bow and button accent and of course a picture of our pup.  Thanks for stopping by to take a look!


Recipe:
Solid cardstock from Bazzill and Recollections
Patterned cardstock from We R Memory Keepers
Name from All Mixed Up cut at 2 inches
Dog from Everyday Paper Dolls cut at 2.5 inches
Ribbon and twine from American Crafts
Button from my stash
Chocolate brown paint and Mod Podge

Friday, April 20, 2012

Birthday Explosion Card

Good evening!  This week sure went by fast!  We don't have too much planned for the weekend so far, but something tells me we will fill our time somehow and before I know it Monday will be here.  

Today is my sweetie's birthday and I wanted to make him a special card.  Have you seen the explosion boxes that some of the talented people out there have been making??  I've been seeing a bunch of them lately and I think they're so neat!  I did some searching and found some instructions HERE (scroll down about 6 entries in the forum for links to the PDF or Word document).  I modified my box slightly from these instructions, starting with a 9x9 square piece of cardstock for the base, scoring it at 3" and 6" along both sides.  For the lid, I used a 6.5"x6.5" square piece of cardstock, scoring it 1.5" in from each side.

I have seen some other exploding boxes that keep the entire square of paper in tact but couldn't find any instructions or tutorials.  If anyone can point me to some I would really appreciate it!!  Anyway, the possibilities are endless with these exploding boxes.  I've seen some exploding albums with 2 or 3 layers - how neat!!  I had fun with my explosion card and can't wait to try an album!

Thanks for coming by to check out my creation and I hope you have a fabulous weekend!

Top of the box.


The 4 sides of the box.


Inside the box (I left the center square open so I could write a birthday message to my sweetie).

Recipe:
Solid cardstock from Bazzill and Recollections
Patterned cardstock from The Paper Studio
Happy Birthday from Sweet Treats cut at 1.25 inches
Present from Sweet Treats cut at 1.5 inches
Party favor from Sweet Treats cut at 1 inch
Cupcake from Sweet Treats cut at 1.5 inches
Party hat from Sweet Treats cut at 1.5 inches
Golfer from Everyday Paper Dolls cut at 2.5 inches
Golf club and ball from Father's Day cut at 2 inches 
Green and flag from Everyday Paper Dolls cut at 2.5 inches
Golf bag and clubs from Everyday Paper Dolls cut at 3 inches
Twine from My Craft Spot
Glossy Accents
Black and white Sakura gel pens

Monday, November 28, 2011

Party Like a Rockstar

Good evening!  I hope everyone had a nice holiday and weekend.  Did anyone find any great Black Friday or Cyber Monday deals??  I didn't do any shopping over the weekend, but I know there were quite a few deals out there!

The project that I have to share tonight is a birthday card for my brother.  My brother played the guitar as we were growing up, and he still enjoys playing from time to time.  When I saw the rocker guy on the Everyday Paper Dolls cartridge, I immediately thought him.  Here's the card I came up with.  Thanks to my good friend Melissa for the idea of tying strands of embroidery thread to the guitar for the strings!!
Recipe:
Solid cardstock from Bazzill and Recollections
Patterned cardstock from DCWV
Rocker guy and guitar from Everyday Paper Dolls cut at 3 1/2 inches
Ribbon from my stash
Face from Peachy Keen Stamp's Everyday Character Face Assortment set
Sentiment from Pink By Design's Rock On set
Embroidery thread, Glossy Accents, white Sakura gel pen

Saturday, September 24, 2011

Lake of the Ozarks

Hello everyone!  I hope you are all enjoying your weekend.  It's a beautiful Saturday here!!  I ran a half marathon this morning with a good friend, and in a little bit I'm headed to one of my bff's for a night of scrappin.  I can't wait to work on more projects!!

This summer, my sweetie and I went to the Lake of the Ozarks a couple of times.  This 2-page layout is from our first trip there this summer, back in June.  It was just the two of us and we stayed in one of his aunt's condos.  We were there for a weekend, but got lots of time in the pool, on the lake, and even found time for a round of golf.  Thanks for stopping by to take a look!


Recipe:
Solid cardstock from Bazzill and Recollections
Patterned cardstock from DCWV
Title from Life's a Beach cut at 1 1/2 inches
Date from Lyrical Letters cut at 1 1/2 inches
Swim trunks from Life's a Beach cut at 2 1/2 inches
Bikini from Life's a Beach cut at 3 inches
Golf cart from Everyday Paper Dolls cut at 3 inches
Baker's twine from My Craft Spot
Black Sakura gel pen for faux stitching and Glossy Accents

Tuesday, June 21, 2011

Belated Happy Father's Day!

What a weekend!  I was hoping to be able to spend some time making cards and working on layouts, but apparently mother nature had something else in mind.  We had really heavy rain and strong winds early Saturday morning - winds strong enough to blow over a very large tree in our backyard.  Might not have been too bad if our house hadn't gotten in the way of the falling tree!  Yes, the tree landed on the roof and part of it even made its way inside the house.  So in the wee early hours of Saturday morning, my sweetie and I were scrambling to try to find bins to catch all of the rain coming in to the house and trying to figure out what we were supposed to do in this situation!  We did sit down about an hour after it happened and say our thanks that we were okay, that our animals were okay and that our house was still standing.  We thought of all the people in Joplin who lost their homes, friends and/or family members to the devastating tornado and reminded ourselves that we were lucky and that it could have been so much worse.

So, needless to say, my weekend plans changed just a bit and crafting and blogging didn't make it too high on the to-do list.  These are the Father's Day cards I made for my dad and for my sweetie's dad.  My dad is a big golfer and was a big part of my coming to love the game as well, so the golf card was of course for him.  My sweetie is taking his dad to a baseball game this week for Father's Day, so we decided to make the card themed toward that.  Thanks for coming by to check them out!

Recipe:
Cardstock from Bazzill and Recollections
Golf bag from Wrap It Up cut at 3 3/4 inches
Baseball diamond from Everyday Paper Dolls cut at 3 1/4 inches
Baker's twine from My Craft Spot
Glossy Accents on bases
White Sakura gel pen
Sentiment from My Pink Stamper's Happiest Moments set

Sunday, June 12, 2011

Golf Thank You

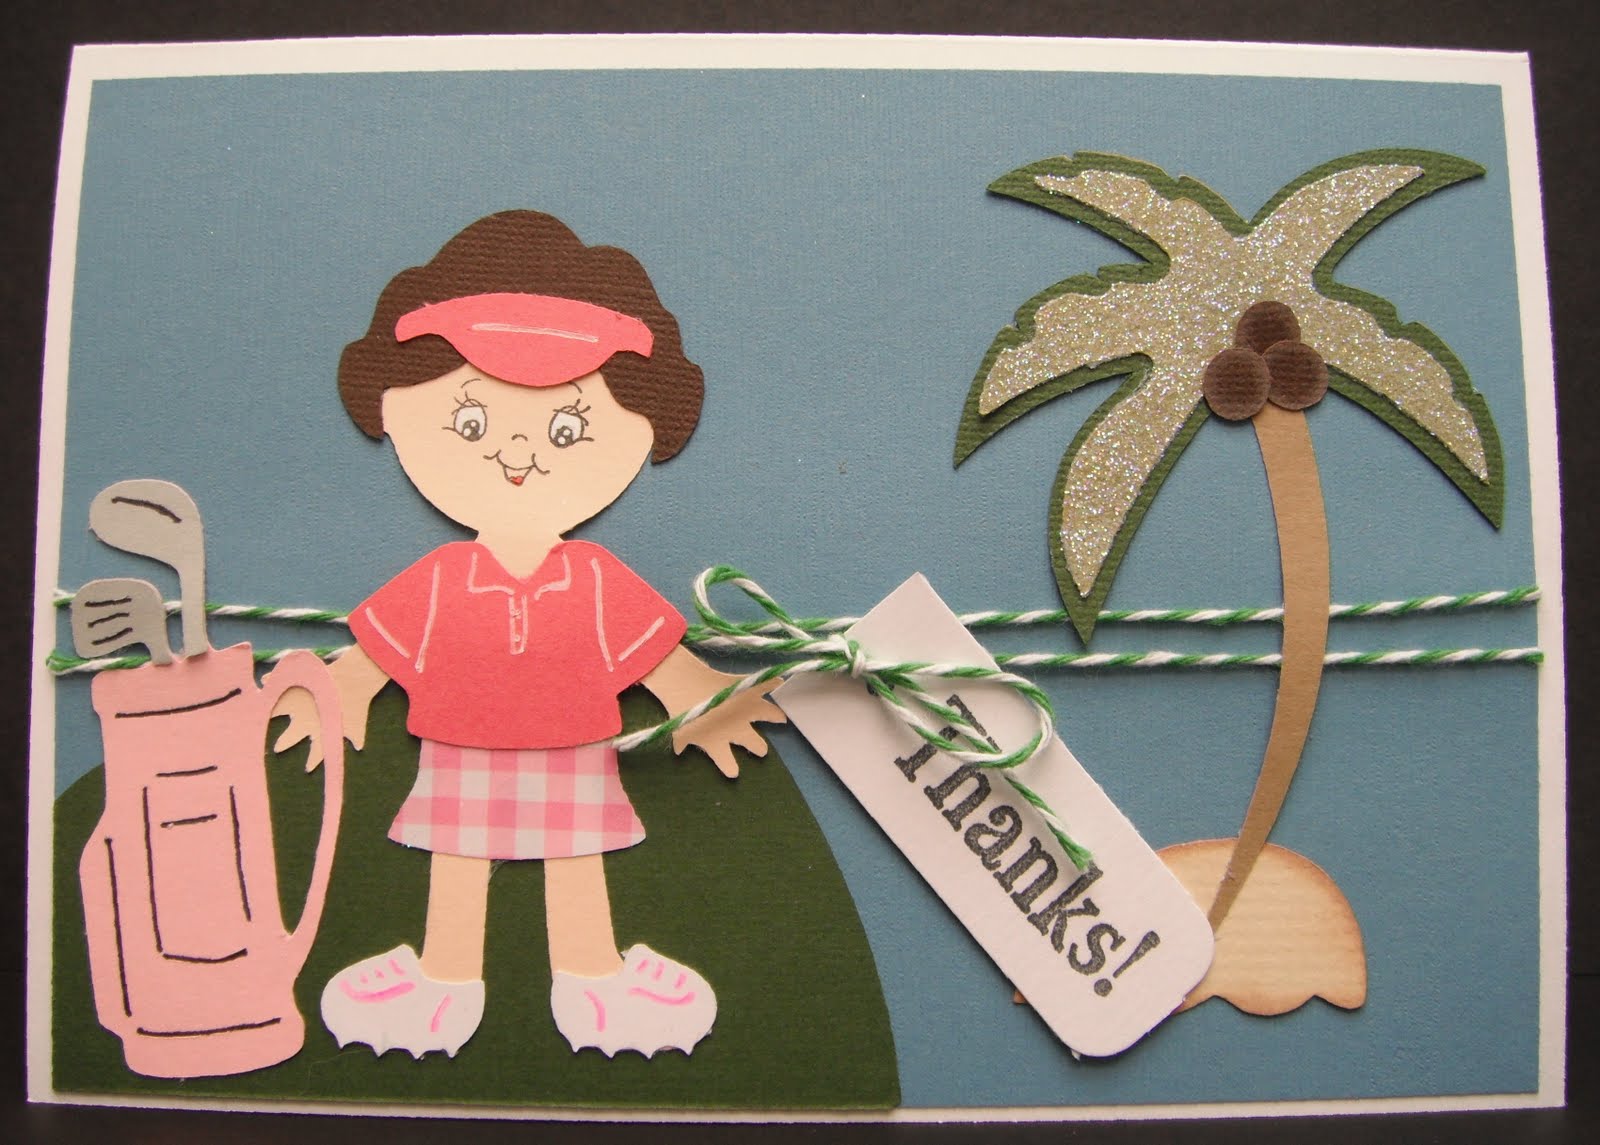
I had a lot of fun playing in the golf tournament the past few days with my mom and a couple other ladies.  We had a lot of fun decorating the carts, participating in various games they had at the pre-tournament party and of course playing golf!  This is a card I made for the lady who invited me to play on her team with my mom.  I was very excited to have the opportunity to play in the tournament with them and wanted to make her a card to say thanks.  Of course I had to keep with the 'Golf's a Beach' theme!!
Recipe:
Cardstock from Bazzill and DCWV
Golfer and accessories from Everyday Paper Dolls cut at 3 1/2 inches
Palm tree from Life's a Beach cut at 4 1/2 inches
Peachy Keen Stamps Wide Eyed Kids Face
Sentiment from TPS Studio
Baker's twine from My Craft Spot

Sunday, May 22, 2011

Another Graduation Card

Tis the graduation season!  I made this card for my sweetie's cousin who is graduating from high school this week.  I wanted to tie her school colors in to the card, which are blue, green and silver.  I also recently ordered a couple sets of Peachy Keen stamps and have been dying to use them.  Unfortunately I had a busy week this week and have not had time to scrap.  Finally today, I made it downstairs and not only got this card created but finally got to use my new stamps! 
Recipe:
Patterned cardstock from DCWV
Solid cardstock from Recollections
Graduate, cap, gown and diploma from Everyday Paper Dolls cut at 3 1/2 inches
Ribbon from my stash
Sentiment from Happiest Moments set by My Pink Stamper
Peachy Keen Everyday Characters face
White Sakura gel pen
i-Rock jewels

Tuesday, April 5, 2011

ISU-MU Football Game Layout

I am an Iowa State Cyclone and my sweetie is a Missouri Tigers fan.  This rivalry has been hard on me because the last few years the Tigers have had better football and basketball teams than the Cyclones.  We still enjoy the games and I wear my Cyclone gear with pride on game days.  Last fall we went up to Ames for the ISU-MU football game.  We had a great time with great friends - though I do have to say it was pretty cold!!  I had fun with these pages, combining paper with our school logos, football paper and the football player image and some of its accessories from the Everyday Paper Dolls Cartridge.
Recipe:
Solid cardstock from Recollections
Football patterned cardstock from my stash
Team logo patterned cardstock from Sports Solution
Football ribbon from the dollar bin at JoAnn's
Title font and shadow cut from Birthday Bash at 2 1/2 inches
Small 'M' on football player's jersey cut from Birthday Bash at 3/4 inch
Football player, goalpost and footballs cut from Everyday Paper Dolls at 6 inches
White Sakura gel pen and white chalk on footballs

Wednesday, March 30, 2011

Congratulations Putting Champ!!

I got an email from my grandparents today.  They moved in to a retirement home a couple of years ago.  They really seem to like it and all the activities available for them.  They were both avid golfers prior to moving into the retirement home, but unfortunately aren't able to get out and play a round of golf like they used to.  Now they're very happy putting on the practice green at their home.  The email I received told me they'd participated in a putting tournament.  There were about 30 people in the tournament and it was a match play event, so similar to March Madness there's a bracket where the winners continue to advance and finally you get down to the last two people playing for the championship.  Sure enough, my grandparents would up meeting each other in the championship match.  From the sounds of it, it was a good match, but my Grandpa ended up victorious.  What started off as a simple congratulations card to my Grandpa turned into a larger, funnier card.  Well.... I think it's funny - we'll see how funny Grandma thinks it is!  My sweetie had the great idea of putting her in the background of the card, upset over the loss.  Here's my creation - I sure hope Grandma's not too mad at me!!
Recipe:
Solid cardstock from Bazzill, Recollections and DCWV
Patterned cardstock from DCWV
Boy golfer, green, trophy and golf ball cut from Everyday Paper Dolls at 3 1/2 inches
Girl golfer cut from Everyday Paper Dolls at 3 inches
Sage Flower Soft on green
Sentiment from Happiest Moments by My Pink Stamper
Stickles on golf ball
Sakura Glaze pens for facial features