Happy Thanksgiving! In my mind, the holiday season officially begins today. This also means that I get to pull all my Christmas decorations out and start decorating the house. As my sweetie so lovingly says, "It looks like Santa threw up in here." I take that as a compliment and think that he's really trying to tell me how festive the house looks. LOL!! I love Christmas and all the decorations that go along with the holiday. I have a few new creations in mind that I hope to be sharing with you soon!
But first, I have one more Thanksgiving card to share. I'm going to submit this in the challenge over at Die Cuttin Divas, where the challenge is Thanksgiving!
I hope you were able to spend the holiday with friends or family, and that we are all reminded of the blessings surrounding us and all that we have to be thankful for. Have a wonderful Thanksgiving!!
Recipe:
Solid cardstock from Bazzill and Recollections
Pattern paper from The Paper Studio
Pilgrim Squirrel from Create a Critter 2 cut at 3.5 inches
Sentiment from My Pink Stamper's Happiest Moments set
Ribbon from The Paper Studio
i-rock gems
White Sakura gel pen
Stickles
Google eyes
Thursday, November 22, 2012
Tuesday, November 20, 2012
Bad to the Bone
Hello! Are you all having a great week so far? How many of you have the rest of the week of for Thanksgiving?? Not me - I only get Thanksgiving Day off. No complaints though - I'll take it!! :-)
The card I'm sharing this evening is one I made for a good friend of mine at work. He is very in to skulls - his cube looks like it is decorated for Halloween all year round! He also likes to listen to music while he is working, so most of the time he has headphones on. I try to makes my cards fit their recipient whenever possible and his birthday cards are always a challenge for me. I managed to find this image on the Rock Princess cartridge though, and with a slight modification, I think it worked. The image has flourishes coming out on the sides. I cut those off from the image and from the shadow layer in an attempt to make the image a little more masculine. He loved the card, so I guess it worked!
Thanks for coming by to take a look!
Recipe:
Solid cardstock from Bazzill and Recollections
Pattern paper from DCWV
Skull and headphones from Rock Princess cut at 3.5 inches
Sentiment from Pink by Design's Rock On set
The card I'm sharing this evening is one I made for a good friend of mine at work. He is very in to skulls - his cube looks like it is decorated for Halloween all year round! He also likes to listen to music while he is working, so most of the time he has headphones on. I try to makes my cards fit their recipient whenever possible and his birthday cards are always a challenge for me. I managed to find this image on the Rock Princess cartridge though, and with a slight modification, I think it worked. The image has flourishes coming out on the sides. I cut those off from the image and from the shadow layer in an attempt to make the image a little more masculine. He loved the card, so I guess it worked!
Thanks for coming by to take a look!
Recipe:
Solid cardstock from Bazzill and Recollections
Pattern paper from DCWV
Skull and headphones from Rock Princess cut at 3.5 inches
Sentiment from Pink by Design's Rock On set
Sunday, November 18, 2012
Another Thanksgiving Card
Happy Sunday! Are you all having a good weekend? And are you ready for Thanksgiving in just a few days?!? I have a couple more cards I need to make, and I'm planning to get those finished up today so they can go out in the mail tomorrow.
This week over at Fantabulous Cricut the challenge is Pilgrim's Progress - make a project using a Pilgrim/Indian or something from the First Thanksgiving. I used this challenge to help inspire one of my Thanksgiving cards.
Thanks for coming by to take a look at my card. Enjoy the rest of your weekend!!
Recipe:
Solid cardstock from Bazzill and Recollections
Pattern paper from The Paper Studio
Pilgrim Hat from Celebrate with Flourish cut at 3.25 inches
Ribbon from The Paper Studio
White Sakura gel pen
This week over at Fantabulous Cricut the challenge is Pilgrim's Progress - make a project using a Pilgrim/Indian or something from the First Thanksgiving. I used this challenge to help inspire one of my Thanksgiving cards.
Thanks for coming by to take a look at my card. Enjoy the rest of your weekend!!
Recipe:
Solid cardstock from Bazzill and Recollections
Pattern paper from The Paper Studio
Pilgrim Hat from Celebrate with Flourish cut at 3.25 inches
Ribbon from The Paper Studio
White Sakura gel pen
Thursday, November 15, 2012
First Thanksgiving Card
Good evening! Thanksgiving is only 1 week away which means I need to get to work on my Thanksgiving cards so I can get them in the mail. Nothing like procrastinating!!
I made this card to fit with this week's challenge over at Die Cuttin Divas. Their challenge this week is a color challenge - use brown, orange, yellow and one other color. I chose green to be my fourth color because it appears in the pattern paper, but I realized when I put the turkey on the card that nearly all of the green is covered up. Oh well!!
Thanks for coming by to take a look and I hope you are all a little further along in your Thanksgiving preparations than I am! :-)
Recipe:
Solid cardstock from Bazzill and Recollections
Pattern paper from The Paper Studio
Turkey from Celebrate with Flourish cut at 3.4 inches
Sentiment from My Pink Stamper's Happiest Moments set
Ribbon from The Paper Studio
Orange crystal gems
I made this card to fit with this week's challenge over at Die Cuttin Divas. Their challenge this week is a color challenge - use brown, orange, yellow and one other color. I chose green to be my fourth color because it appears in the pattern paper, but I realized when I put the turkey on the card that nearly all of the green is covered up. Oh well!!
Thanks for coming by to take a look and I hope you are all a little further along in your Thanksgiving preparations than I am! :-)
Recipe:
Solid cardstock from Bazzill and Recollections
Pattern paper from The Paper Studio
Turkey from Celebrate with Flourish cut at 3.4 inches
Sentiment from My Pink Stamper's Happiest Moments set
Ribbon from The Paper Studio
Orange crystal gems
Tuesday, November 13, 2012
Anniversary Card
Good evening! Can you believe it's already the middle of November and Thanksgiving is next week?!? I sure can't!! Looks like I better get my Thanksgiving cards made this week!!
The card I have to share tonight is the one I made for my sweetie's father and his wife who celebrated their first anniversary this past weekend. I wanted to keep the card pretty simple and I wanted to incorporate the colors from their wedding. No Cricut images on this card which is pretty rare for me!
Recipe:
Cardstock from Bazzill
Swirly Vines w/Hearts embossing folder
Martha Stewart Double Loops border punch
American Crafts ribbon
i-rock gems
Sentiment from My Craft Spot's Always & Forever set
Black embossing powder
The card I have to share tonight is the one I made for my sweetie's father and his wife who celebrated their first anniversary this past weekend. I wanted to keep the card pretty simple and I wanted to incorporate the colors from their wedding. No Cricut images on this card which is pretty rare for me!
Thanks for coming by to take a look!
Cardstock from Bazzill
Swirly Vines w/Hearts embossing folder
Martha Stewart Double Loops border punch
American Crafts ribbon
i-rock gems
Sentiment from My Craft Spot's Always & Forever set
Black embossing powder
Saturday, November 10, 2012
Thanksgiving Wreath
Happy Saturday! Are you all enjoying the weekend so far?? We are having wonderful weather here, though it is a bit windy! I had a nice run this morning with one of my good friends and then my sweetie and I played in a golf tournament with another good friend of ours. Got a few chores done and then I got to finish the project I'm sharing with you today. So far my weekend is going great! :-)
I saw a terrific Halloween wreath on Pinterest a while back and decided to make a Thanksgiving version to hang on our front door. Check out the Halloween wreath I found HERE - very neat!
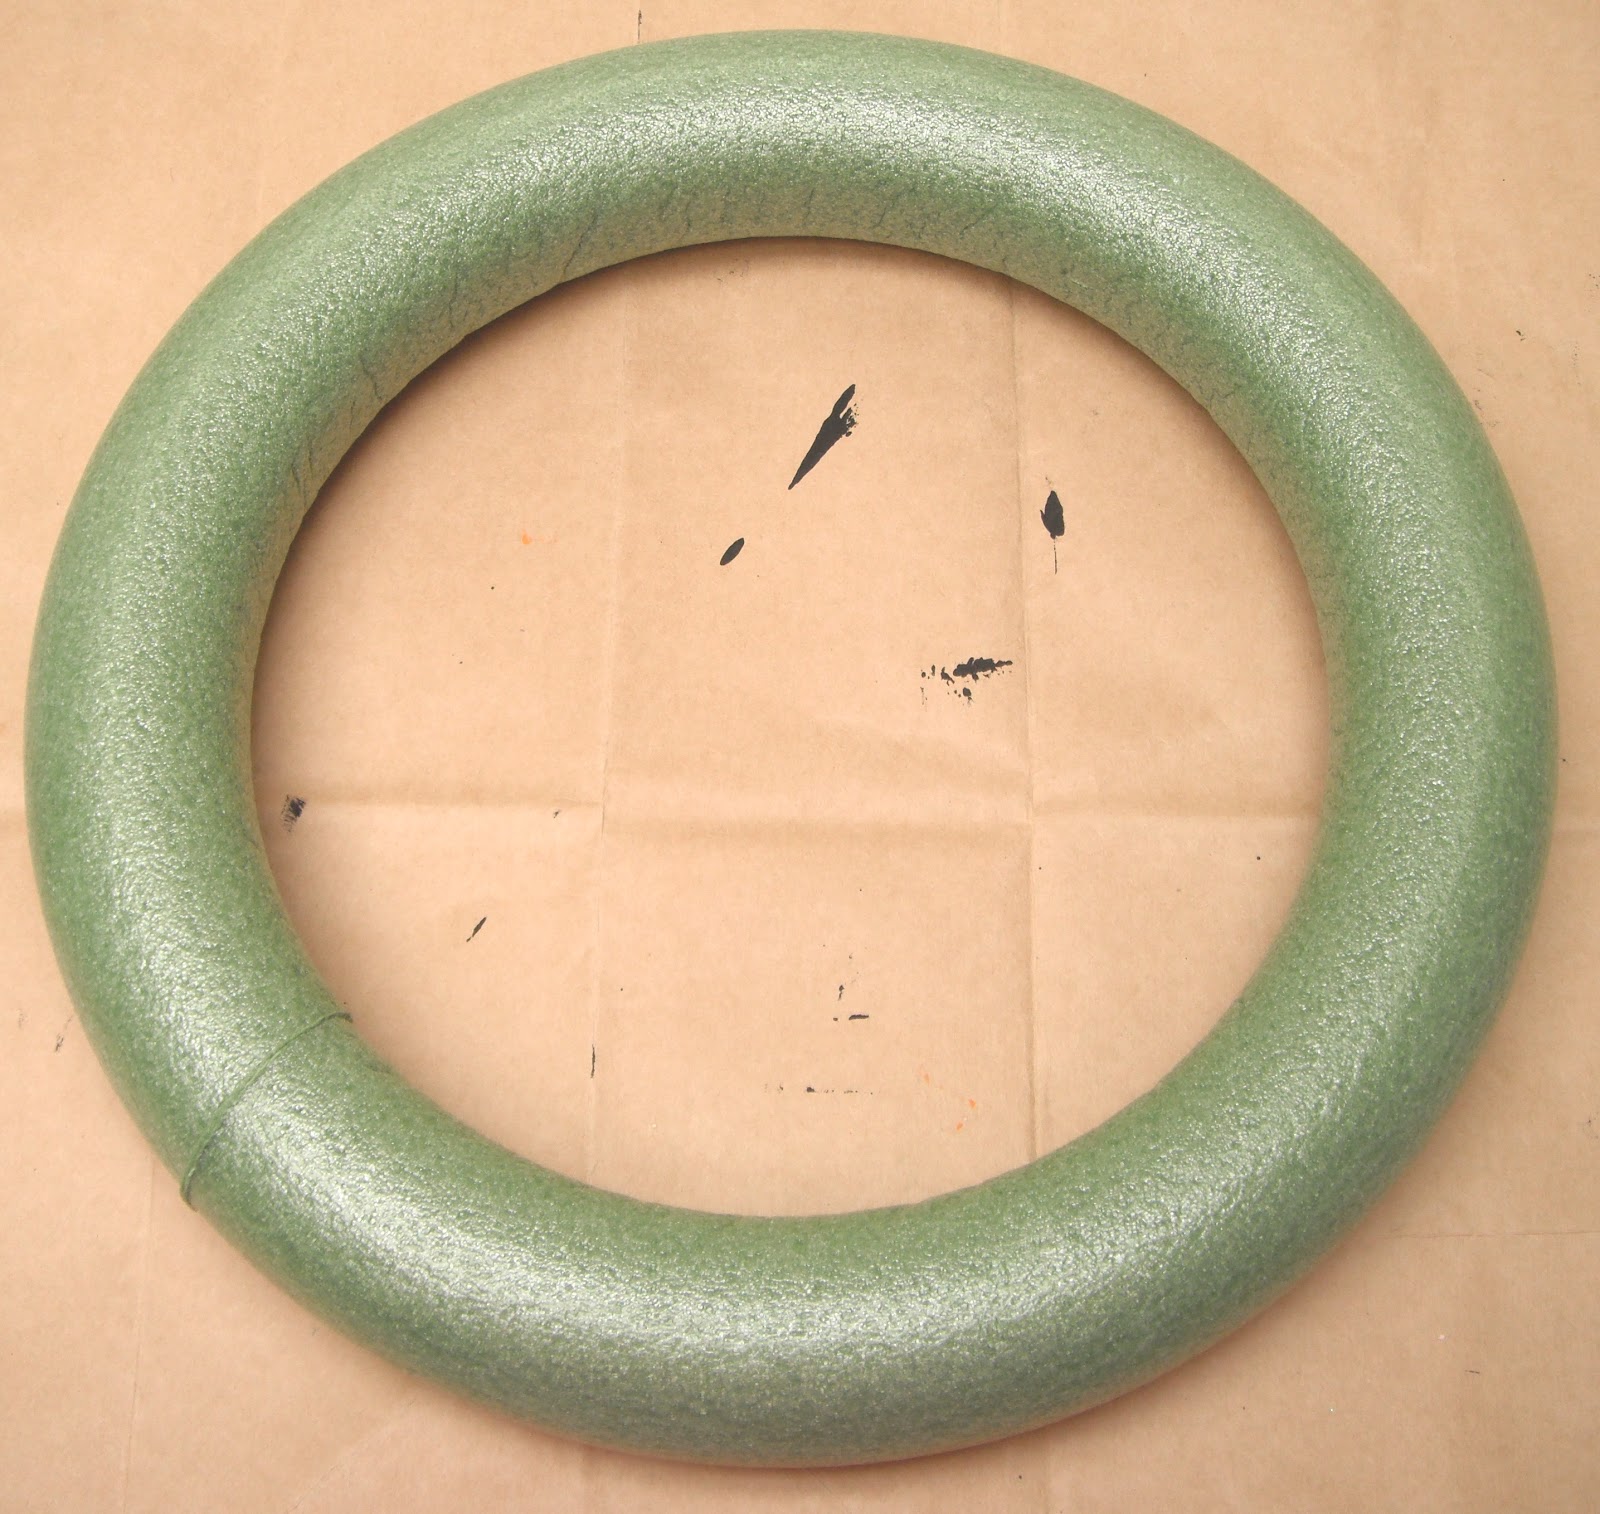
This is how my wreath started:
I took a 12 inch foam wreath form and painted it with light brown acrylic paint. This step may not really be necessary, but I didn't want any of the green foam form peeking through the burlap, so I did this just in case.
Then I cut burlap in 1 in x 16 in strips and tied the strips around the wreath in a simple double knot. I used about 45 strips to go all the way around the wreath. (FYI - The tutorial I linked to said 1.25 yds of burlap in the instructions. I bought 1.5 yards off a bolt and it was way too much!!)
Finally I cut a few Thanksgiving images from Cricut cartridges and adhered them to the wreath with hot glue. Now it's ready to hang on the front door!!
I'm going to submit this project in the challenge over at Fantabulous Cricut. The challenge this week is Fall Harvest - make a project using fall leaves.
Thanks for coming by to take a look! Have a great weekend!!
Recipe:
12 inch wreath form
Brown acrylic paint
Burlap
Happy Thanksgiving from Lyrical Letters cut at 3 inches
Frame from Elegant Edges cut at 5 x 8 inches
Leaves from Celebrate with Flourish cut at 3.5 inches
Turkey from Create a Critter 2 cut at 3.75 inches
I saw a terrific Halloween wreath on Pinterest a while back and decided to make a Thanksgiving version to hang on our front door. Check out the Halloween wreath I found HERE - very neat!
This is how my wreath started:
I took a 12 inch foam wreath form and painted it with light brown acrylic paint. This step may not really be necessary, but I didn't want any of the green foam form peeking through the burlap, so I did this just in case.
Then I cut burlap in 1 in x 16 in strips and tied the strips around the wreath in a simple double knot. I used about 45 strips to go all the way around the wreath. (FYI - The tutorial I linked to said 1.25 yds of burlap in the instructions. I bought 1.5 yards off a bolt and it was way too much!!)
Finally I cut a few Thanksgiving images from Cricut cartridges and adhered them to the wreath with hot glue. Now it's ready to hang on the front door!!
I'm going to submit this project in the challenge over at Fantabulous Cricut. The challenge this week is Fall Harvest - make a project using fall leaves.
Thanks for coming by to take a look! Have a great weekend!!
Recipe:
12 inch wreath form
Brown acrylic paint
Burlap
Happy Thanksgiving from Lyrical Letters cut at 3 inches
Frame from Elegant Edges cut at 5 x 8 inches
Leaves from Celebrate with Flourish cut at 3.5 inches
Turkey from Create a Critter 2 cut at 3.75 inches
Tuesday, November 6, 2012
Running Thank You
Happy Election Day! Did everyone get out and vote today?? I hope so!! I'm very interested to see how this election turns out, but I will admit I'm also very ready for all the political commercials, mailings, etc to come to an end. My sweetie is glued to the tv watching the election result coverage and I am nearby working on some crafts and keeping an eye on the tv as well.
This past weekend, one of my running friends hosted a Breakfast Run from her house. Our usual Saturday morning running club was not meeting so she decided to invite a group of people over to run and have breakfast. She even set water out for us along the route so we didn't have to carry bottles with us. It was so nice of her to organize this run and she remembered all the small details! I just had to make a thank you card for her to let her know how much I appreciate her organizing this.
Die Cuttin Divas is having a sketch challenge this week and I used the sketch for inspiration in creating this thank you card. Here is the sketch:
And here is the card I created:
Thanks for stopping by to take a look! I hope everyone's week is off to a good start!!
Recipe:
Solid cardstock from Bazzill and Recollections
Pattern cardstock from DCWV
Frame and border from Elegant Edges cut at 3 inches
Runner from Pink Journey cut at 2.45 inches
Rub-on sentiment
i-rock gems
Subscribe to:
Posts (Atom)